Lemon Blueberry Bundt Cake

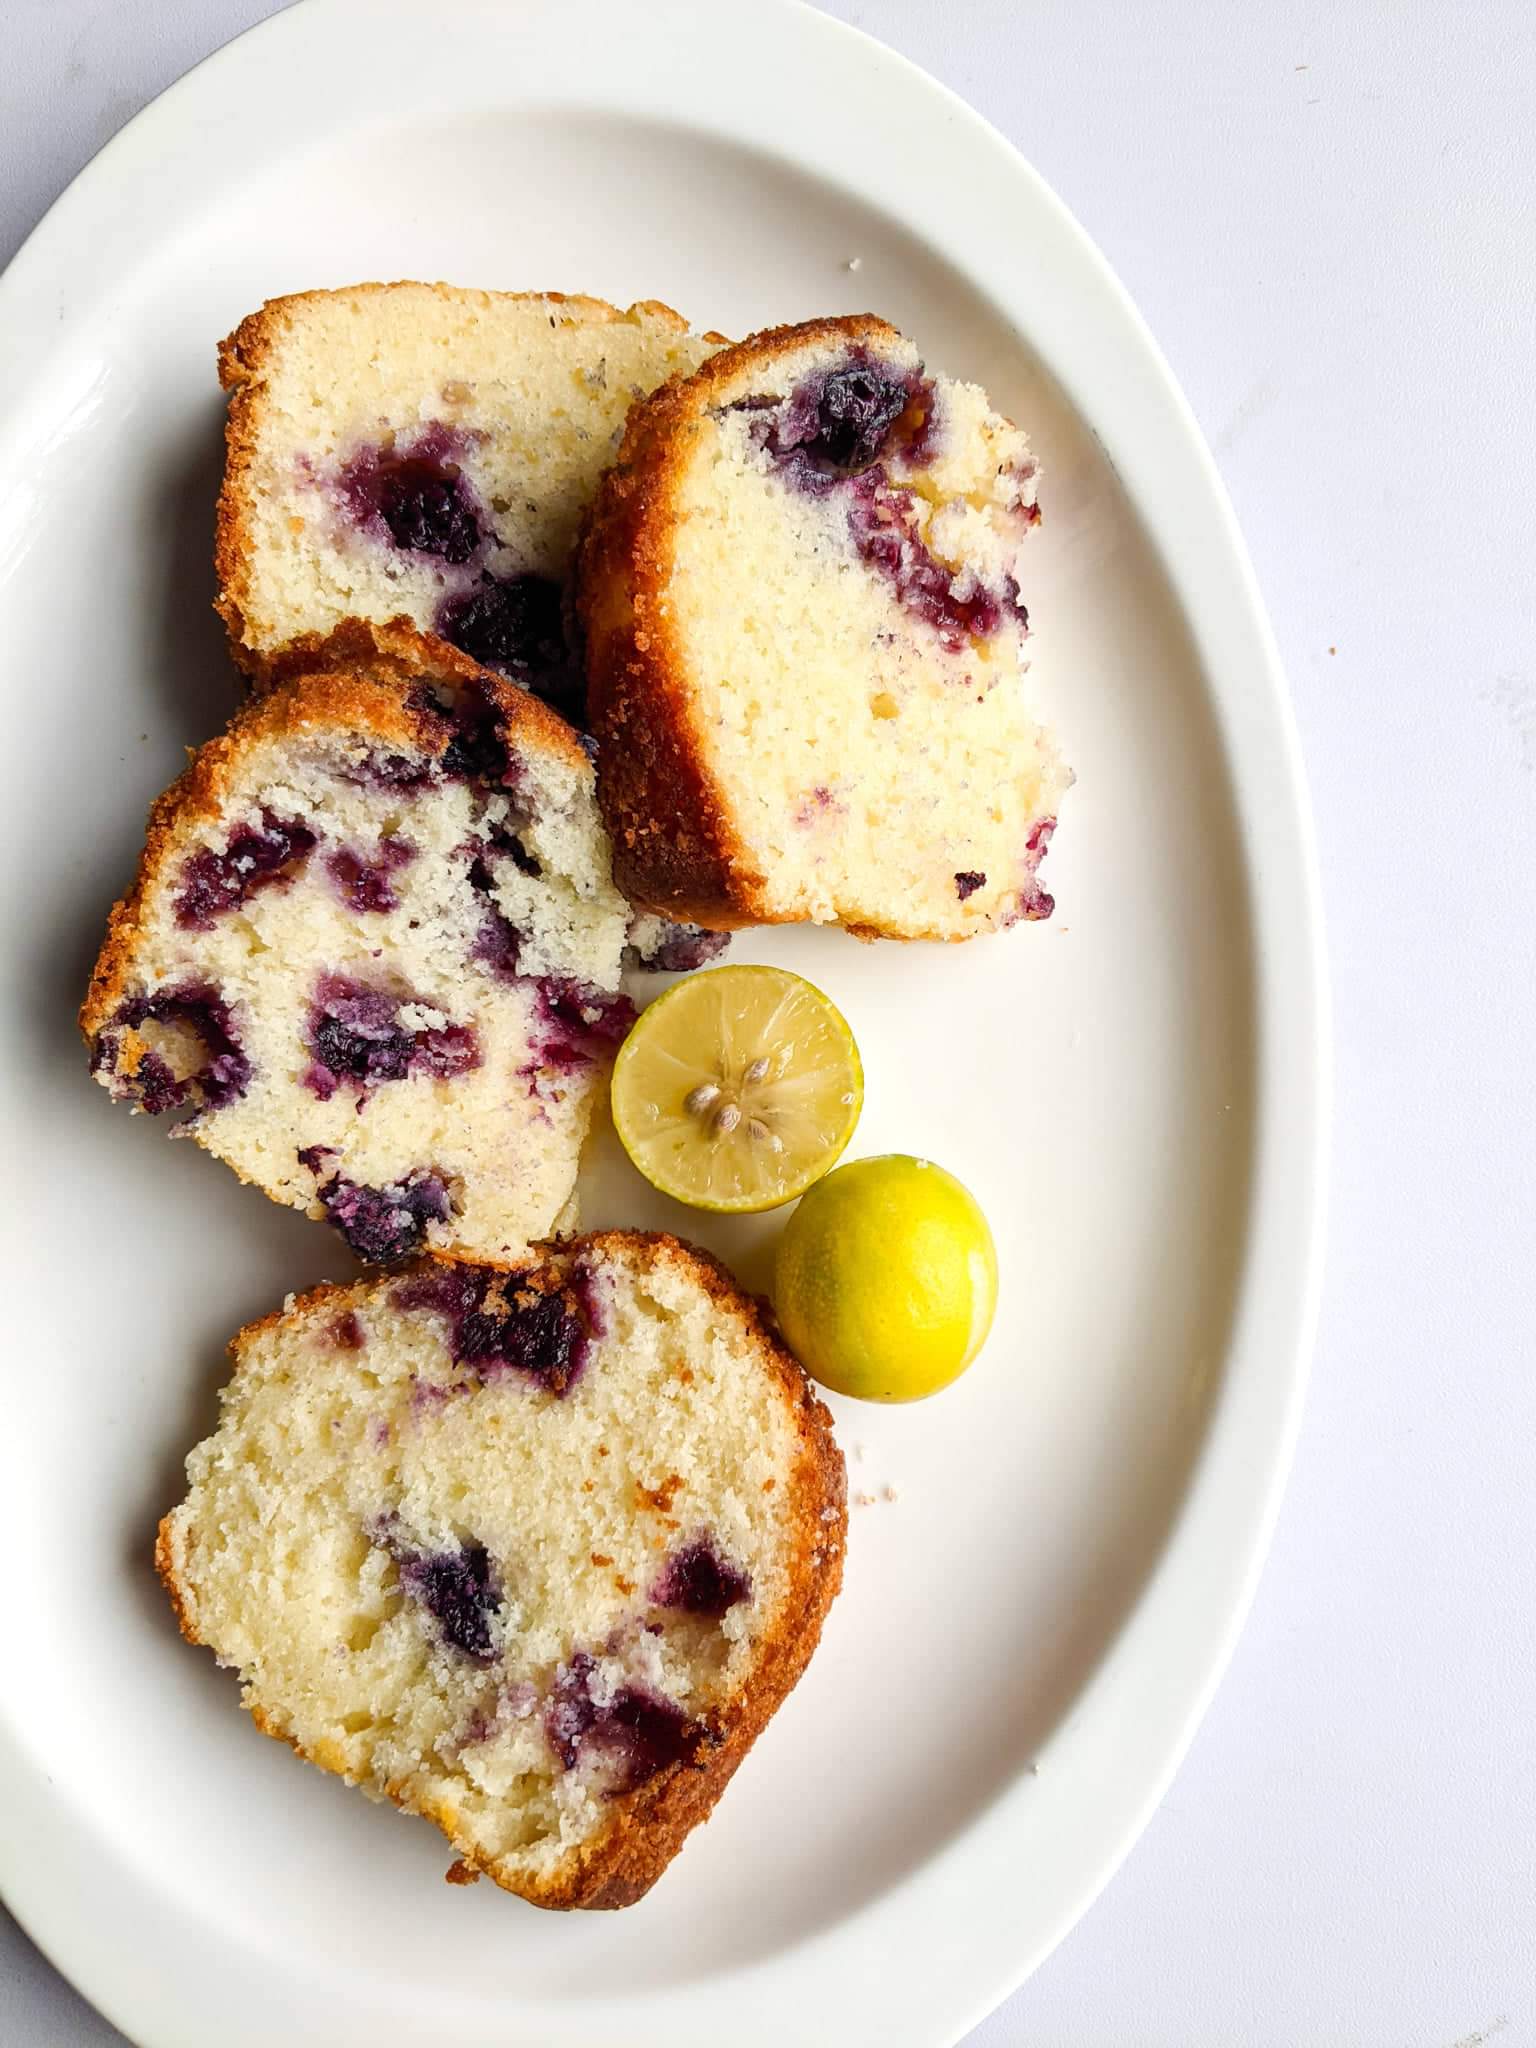
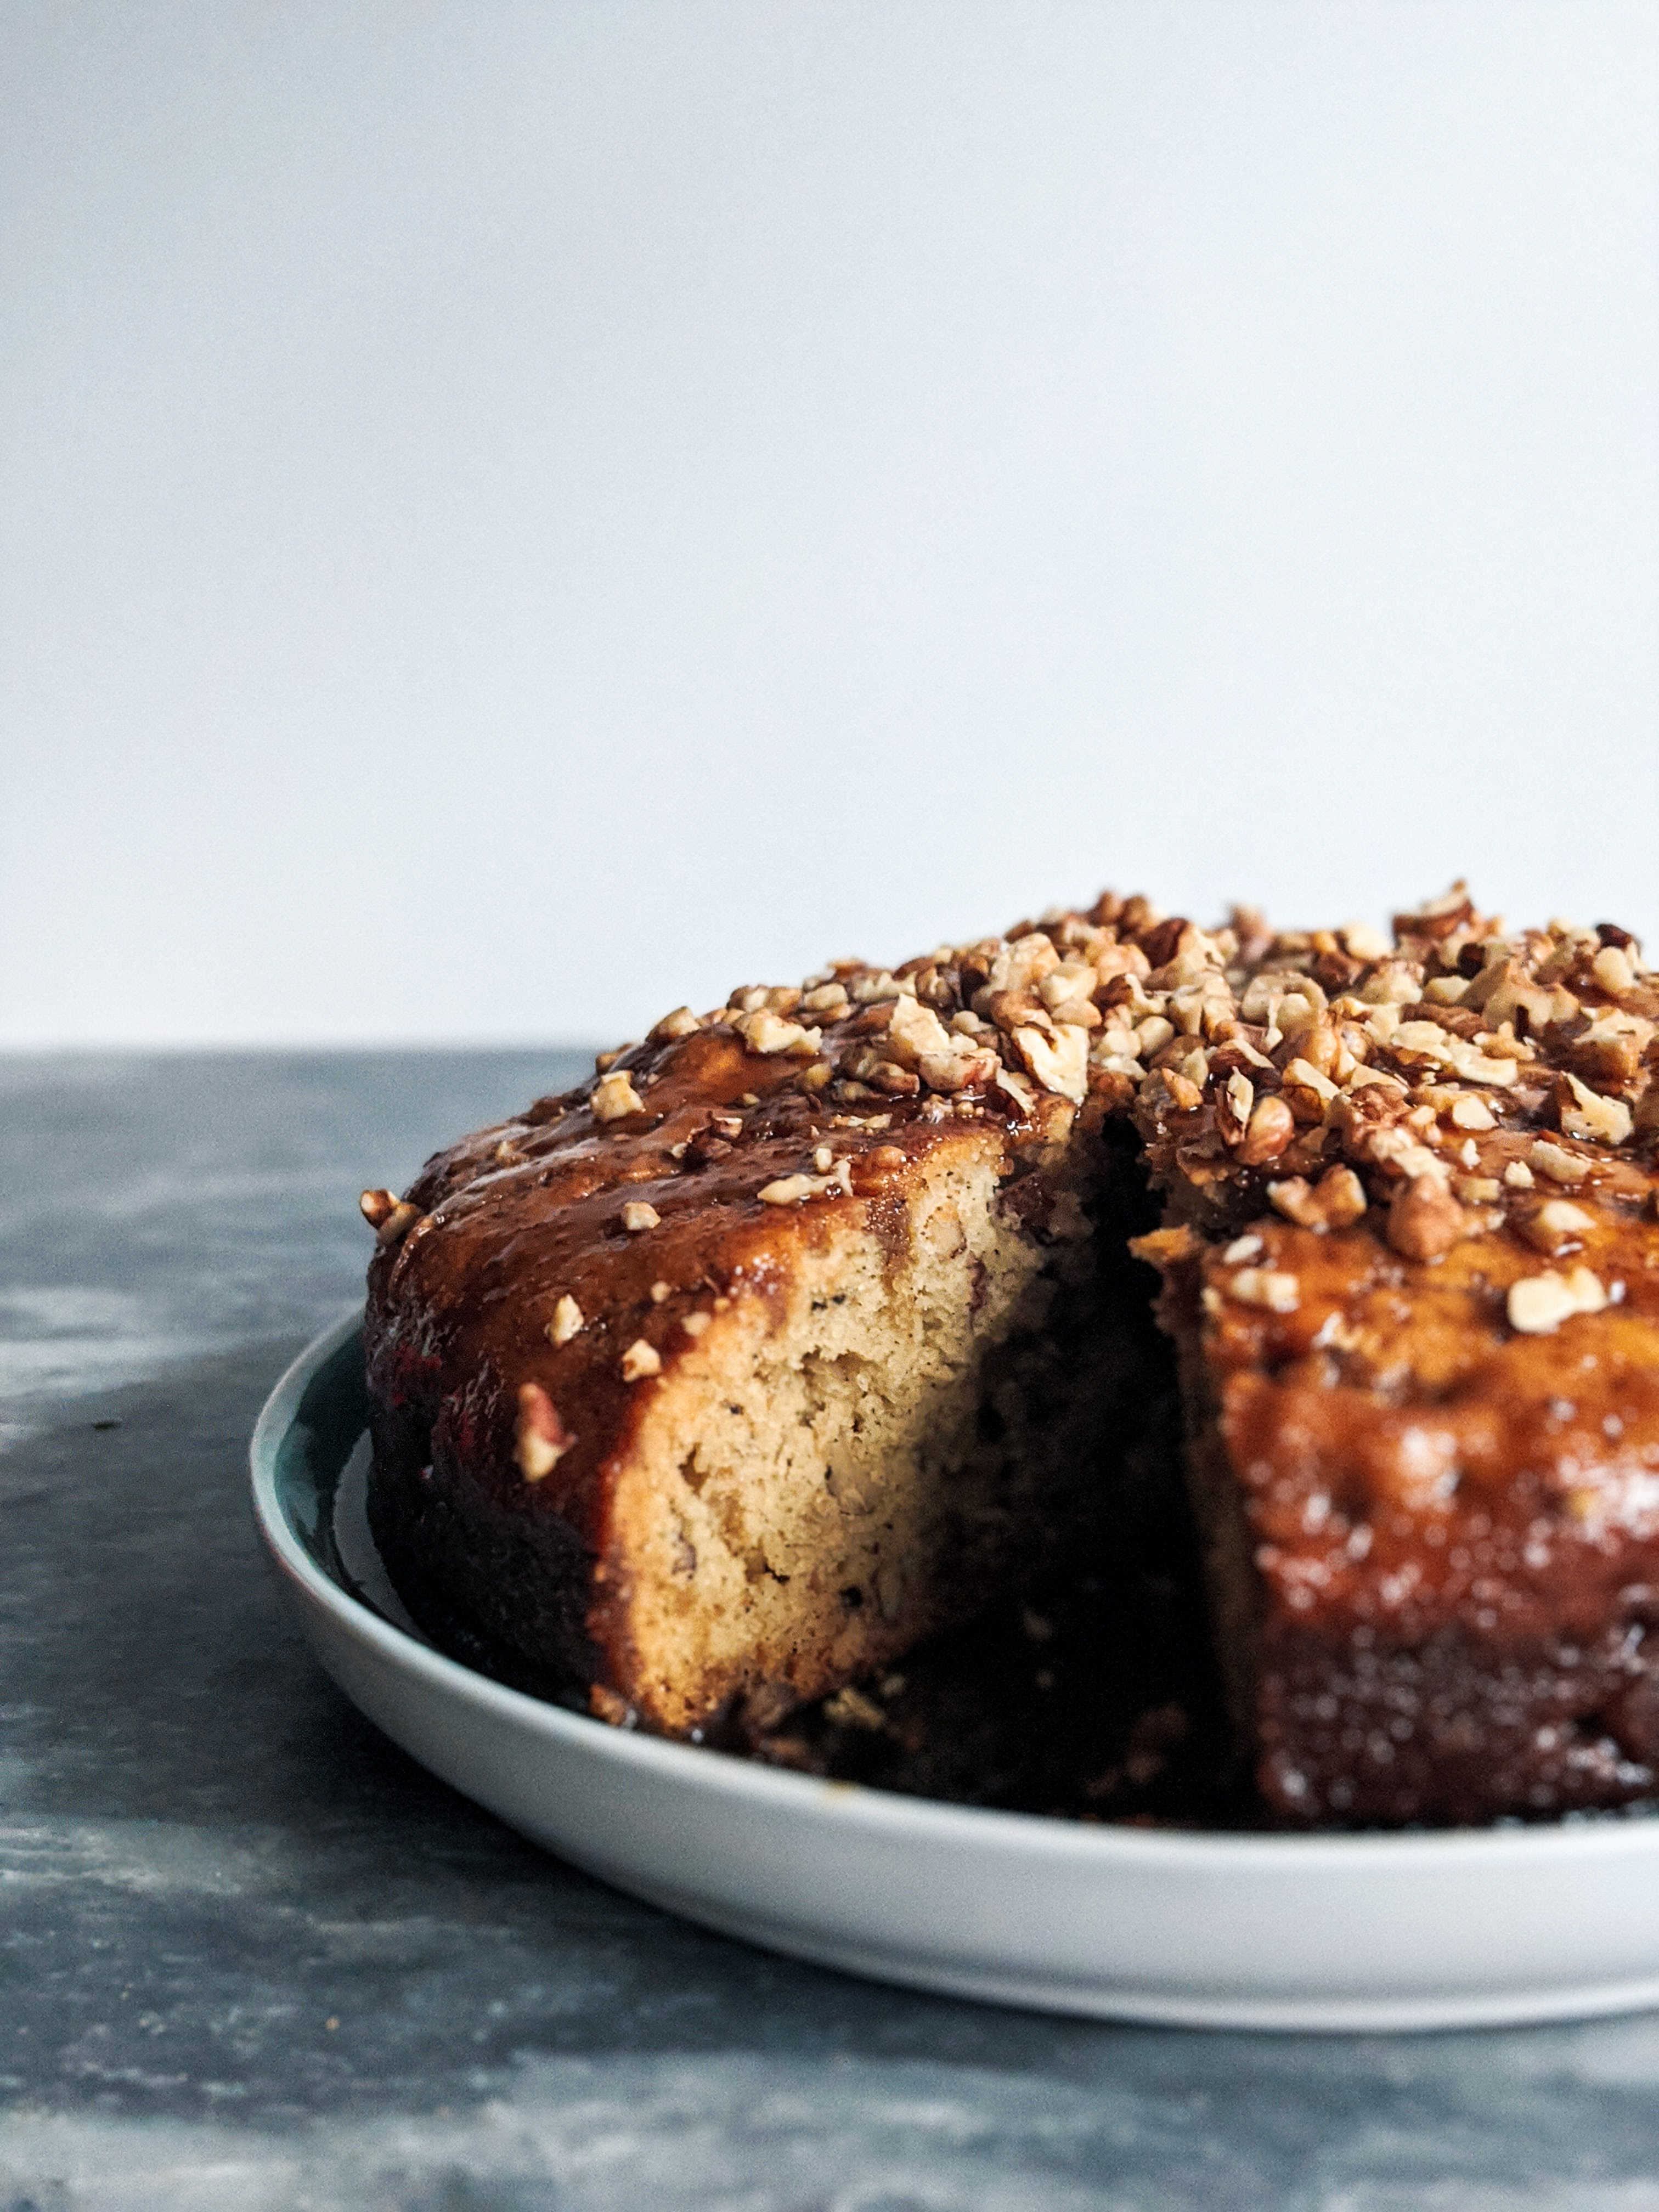
Perfectly moist and lemony bundt cake bursting with blueberries.

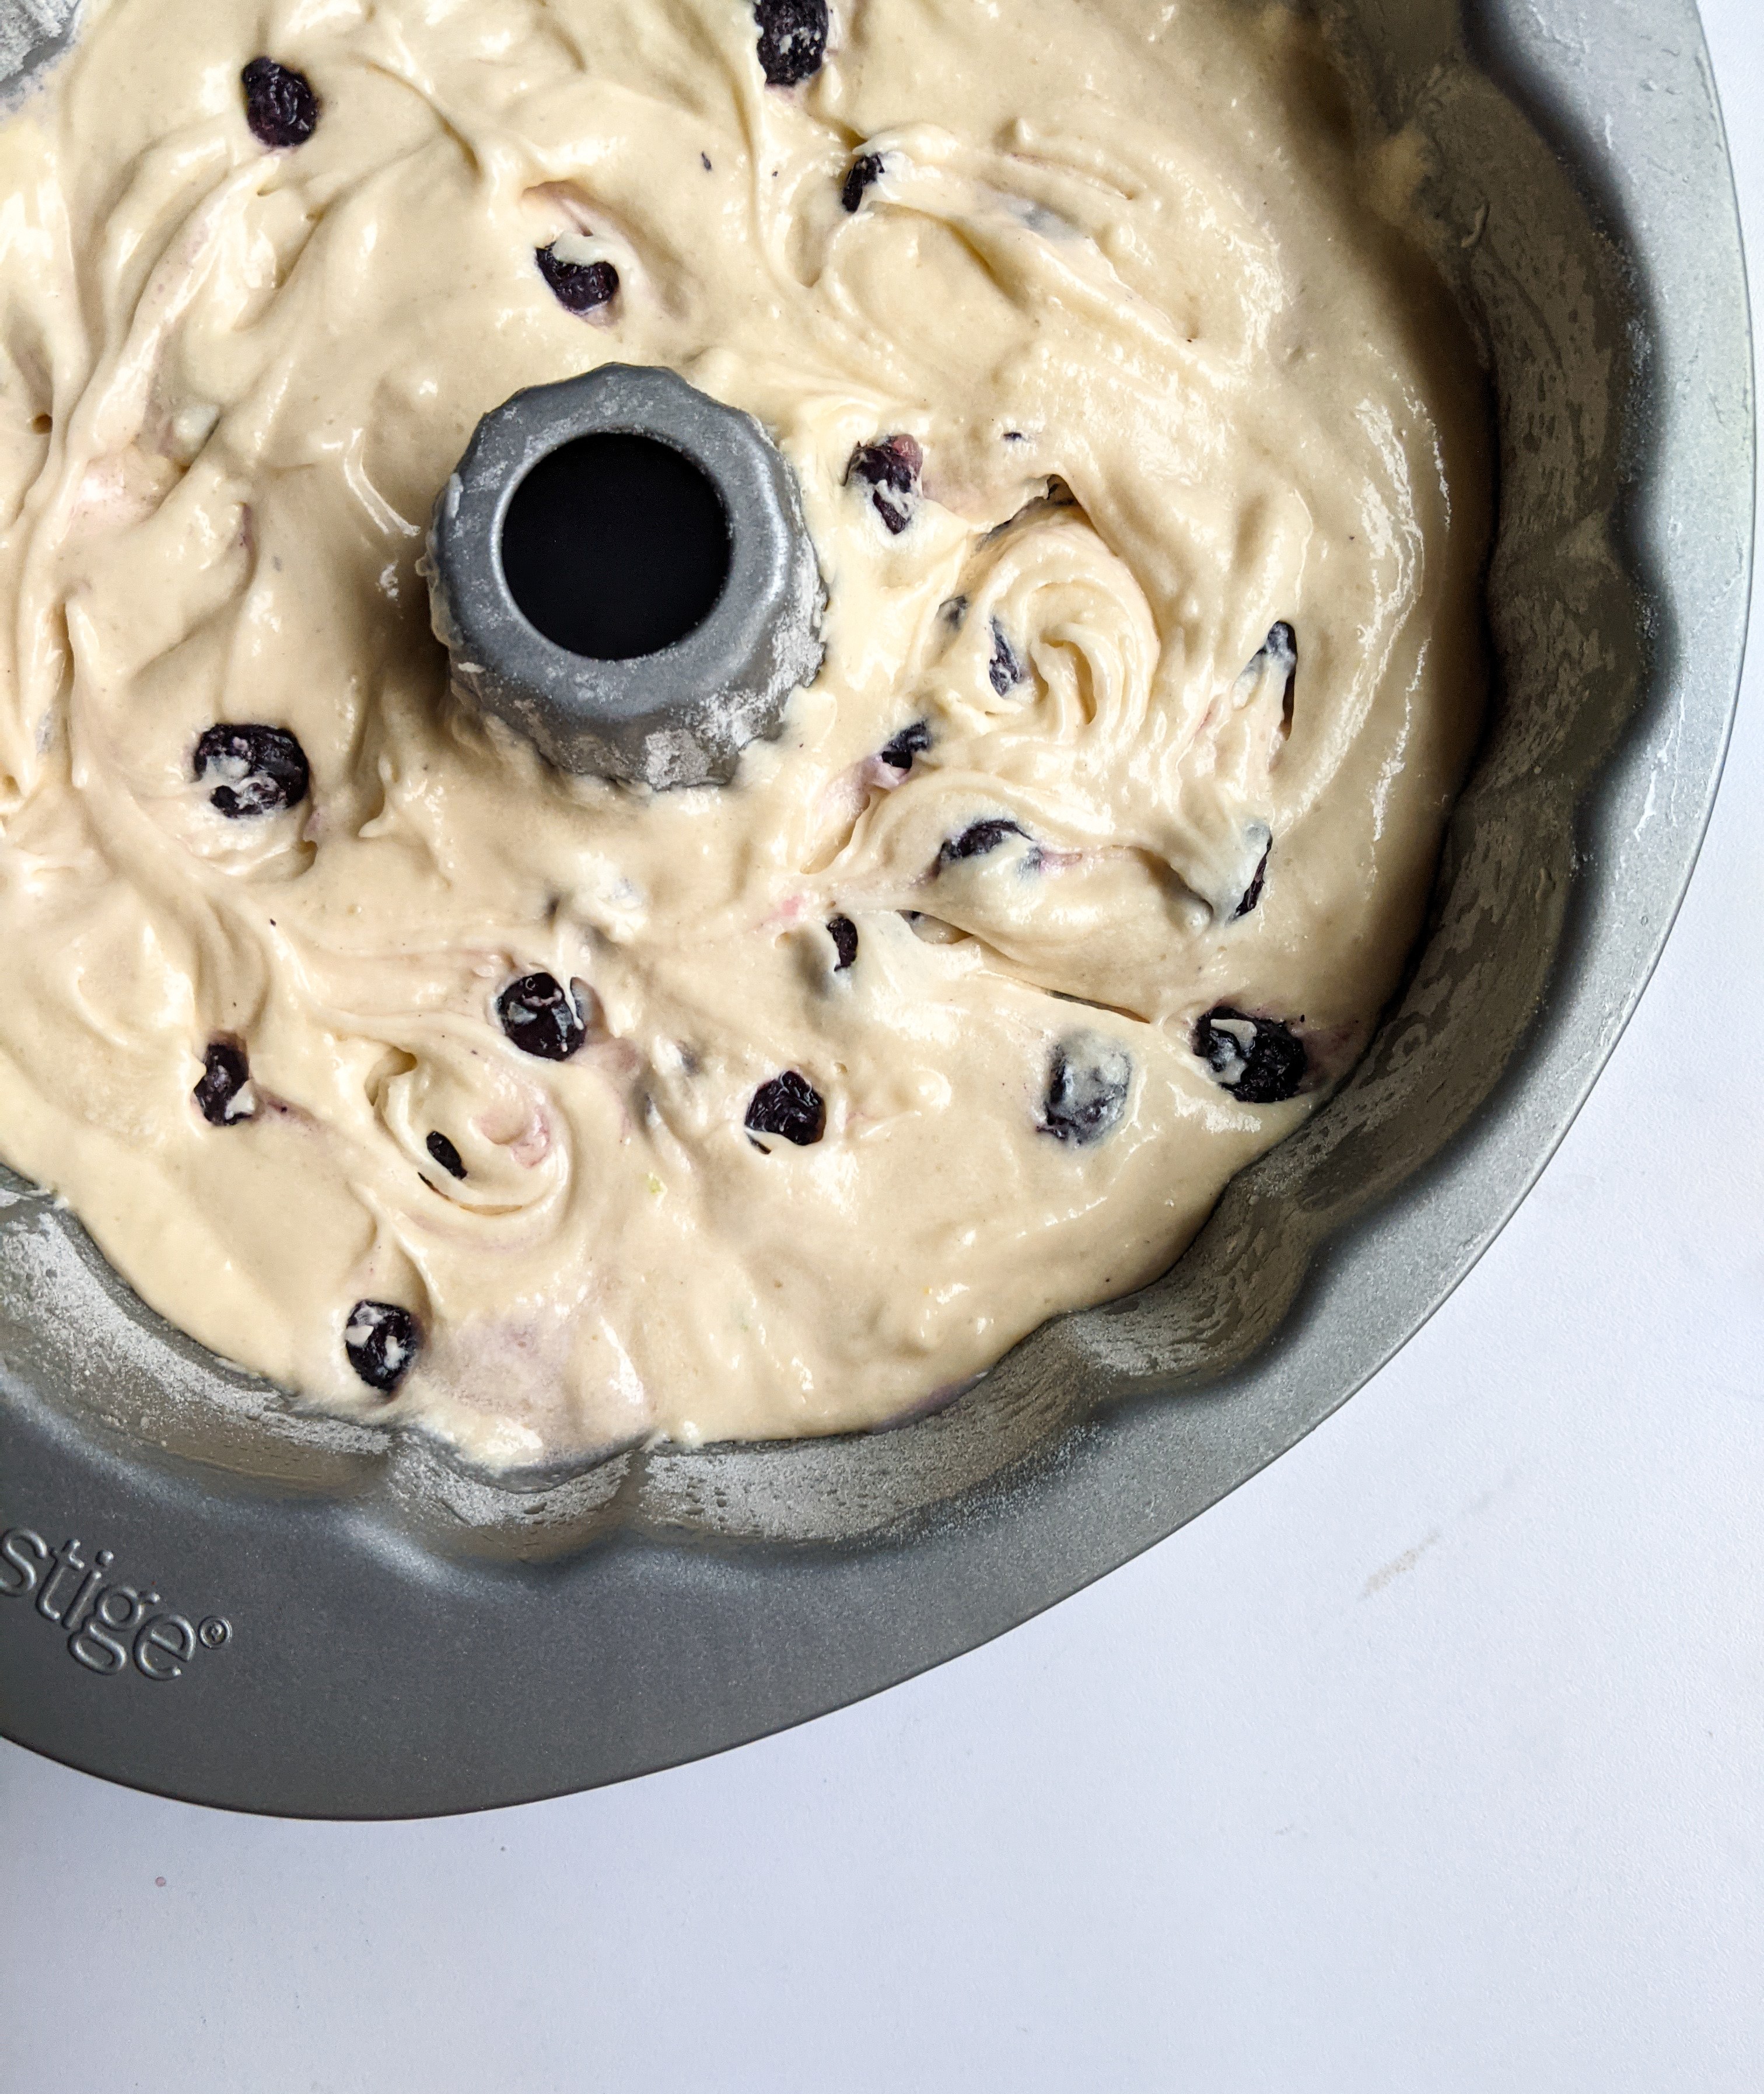
I was a bit dubious about using frozen blueberries fearing that they might sink to the bottom or become mushy and turn the batter grey; but they actually worked out like a dream.

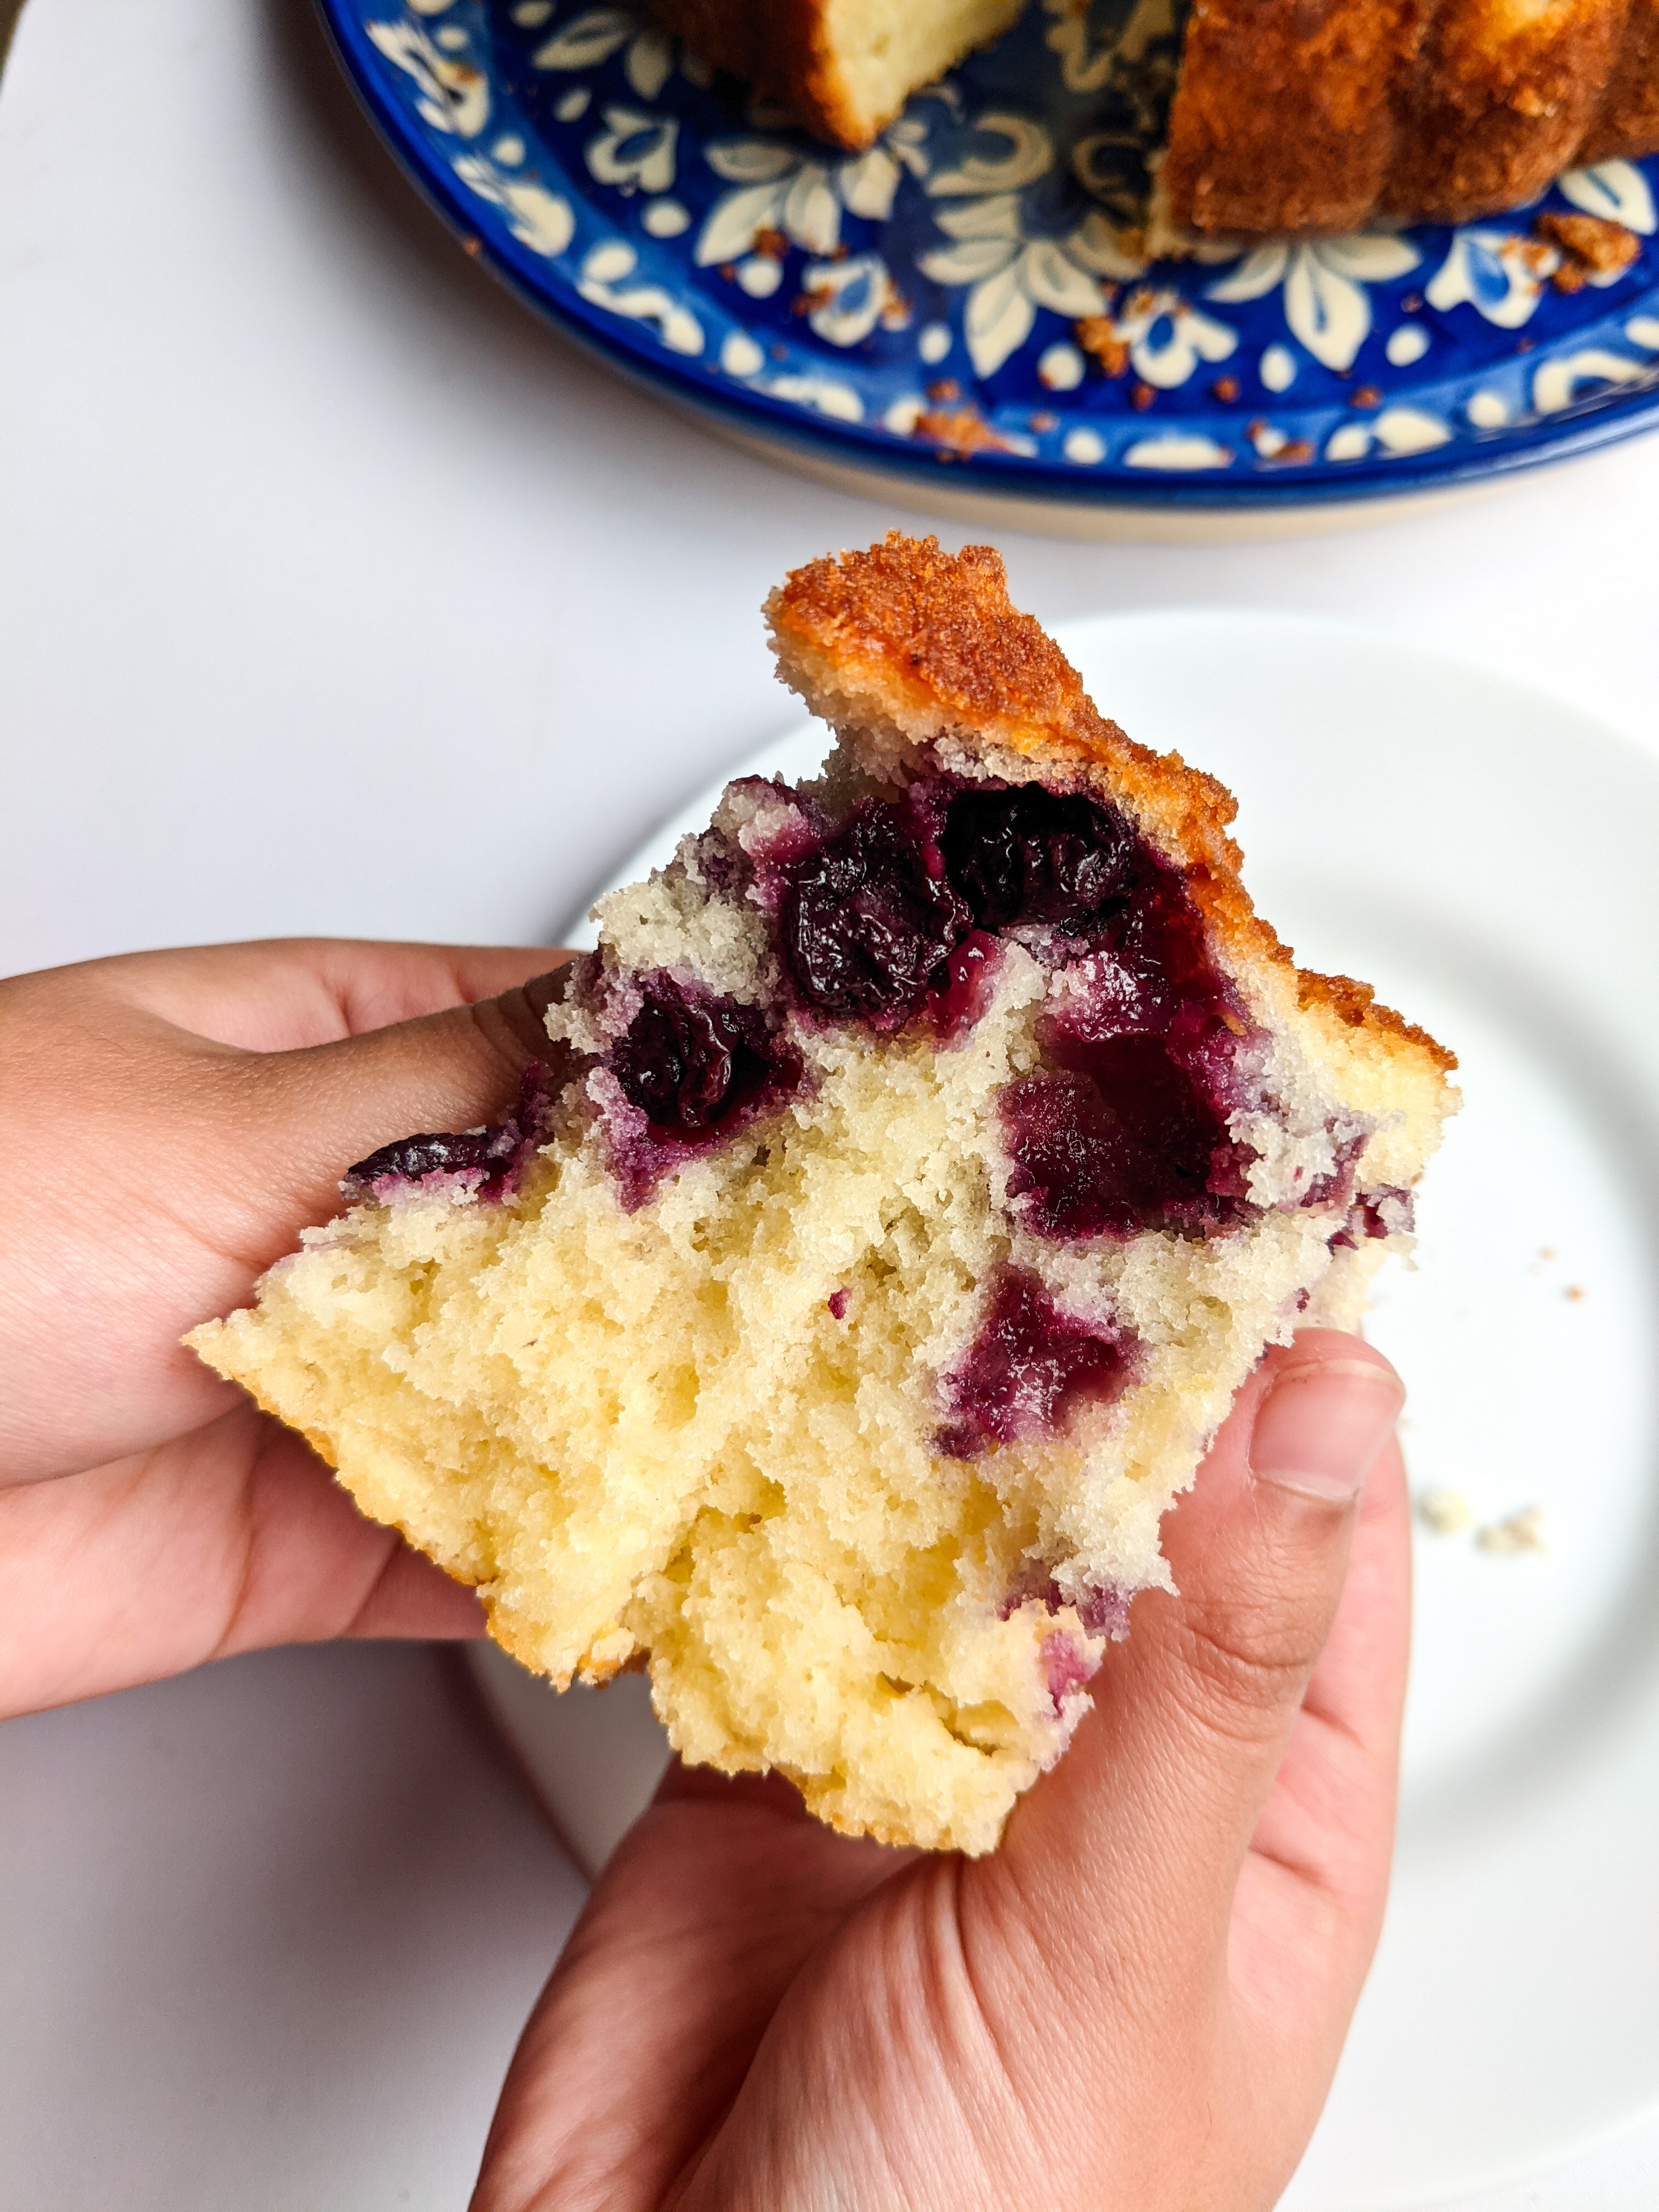
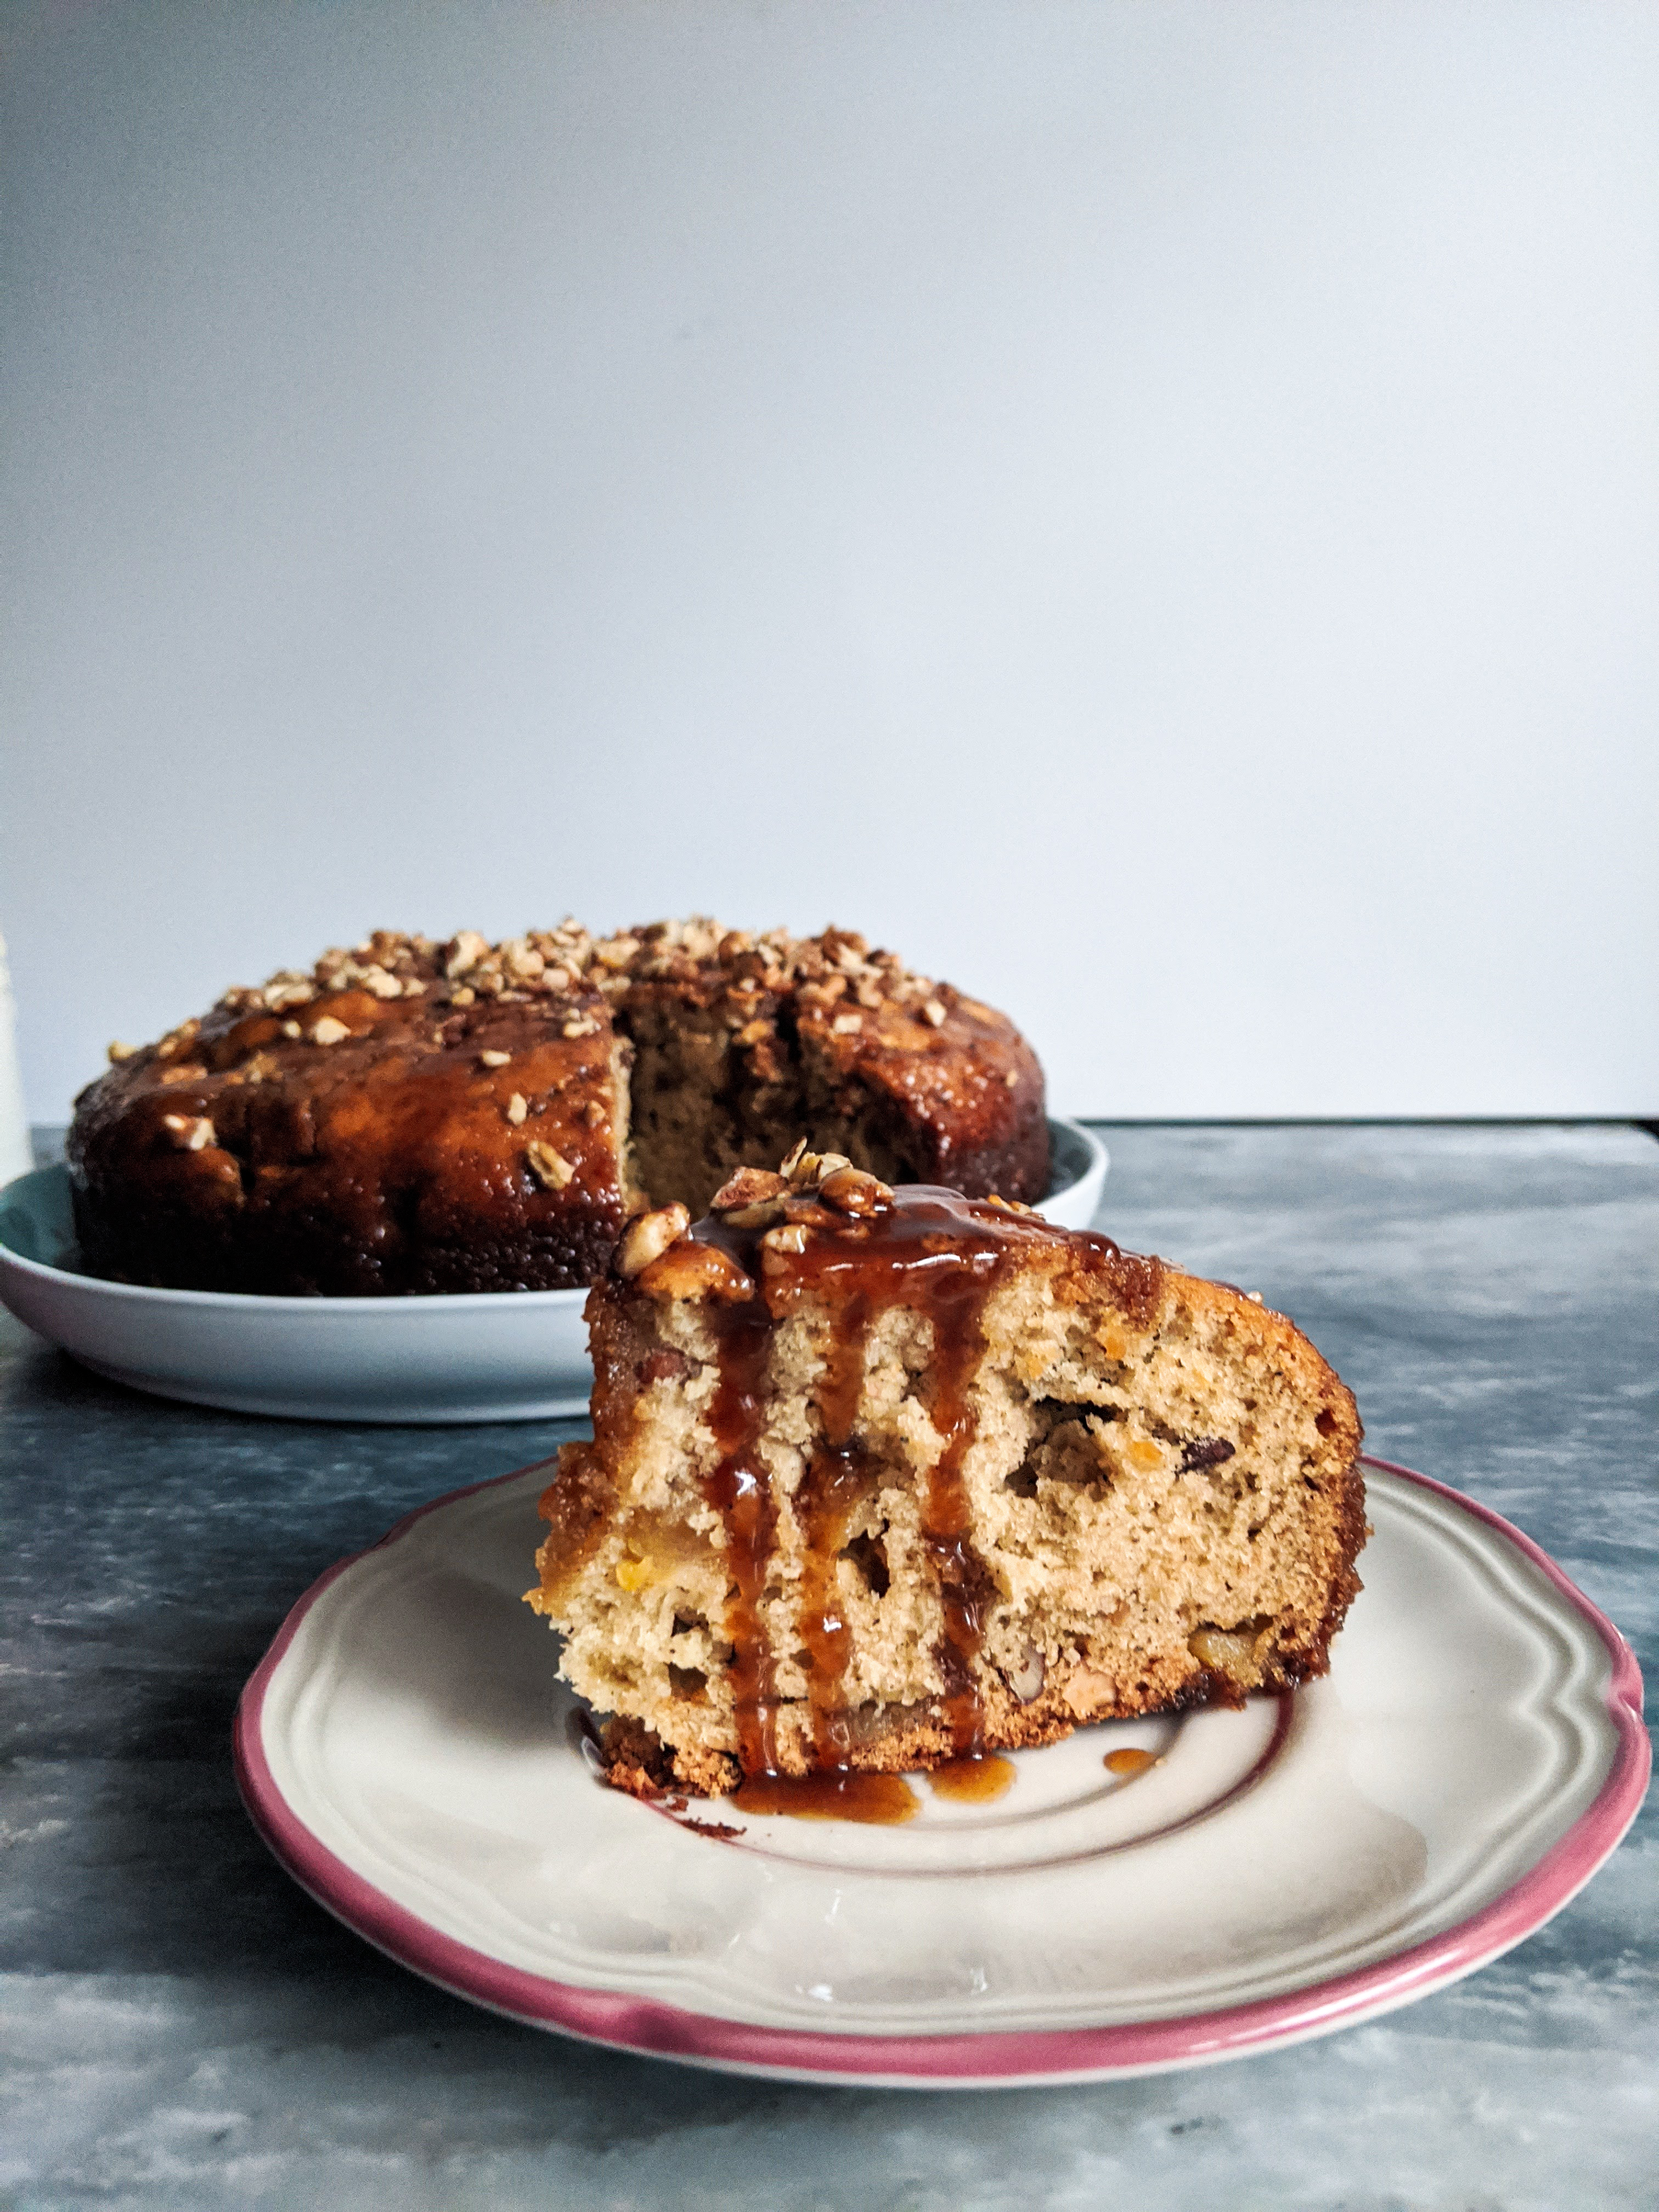
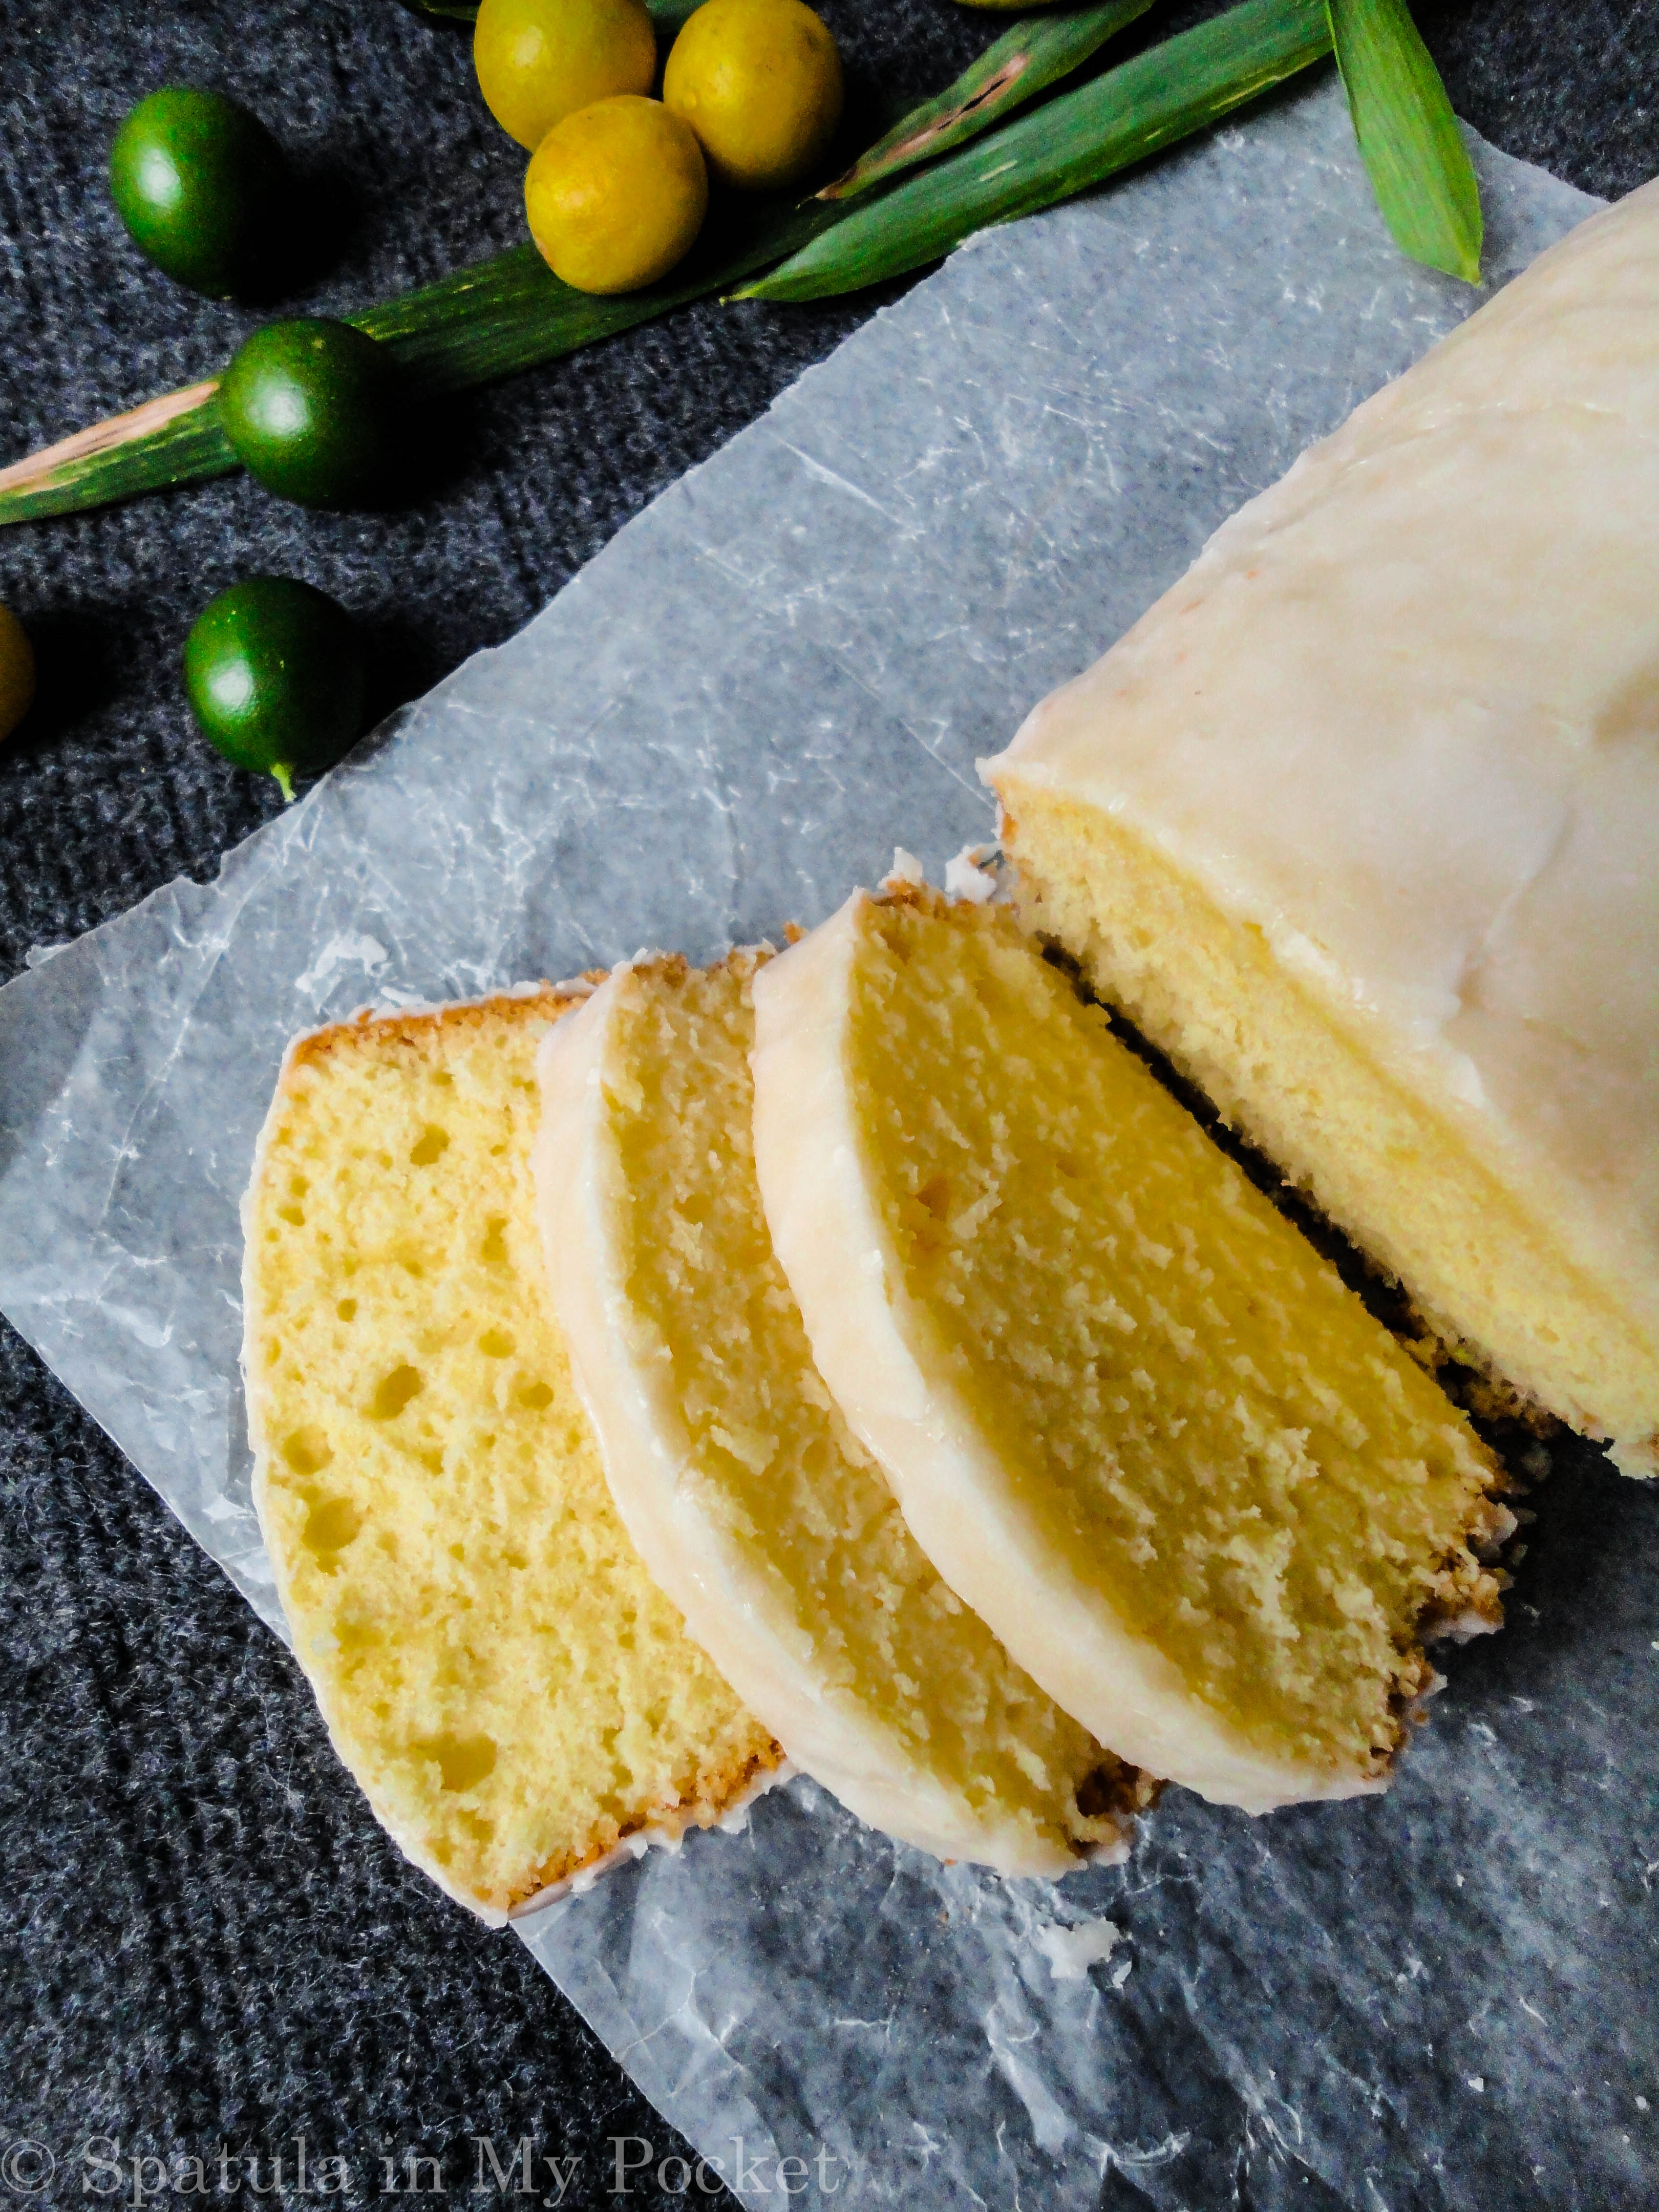
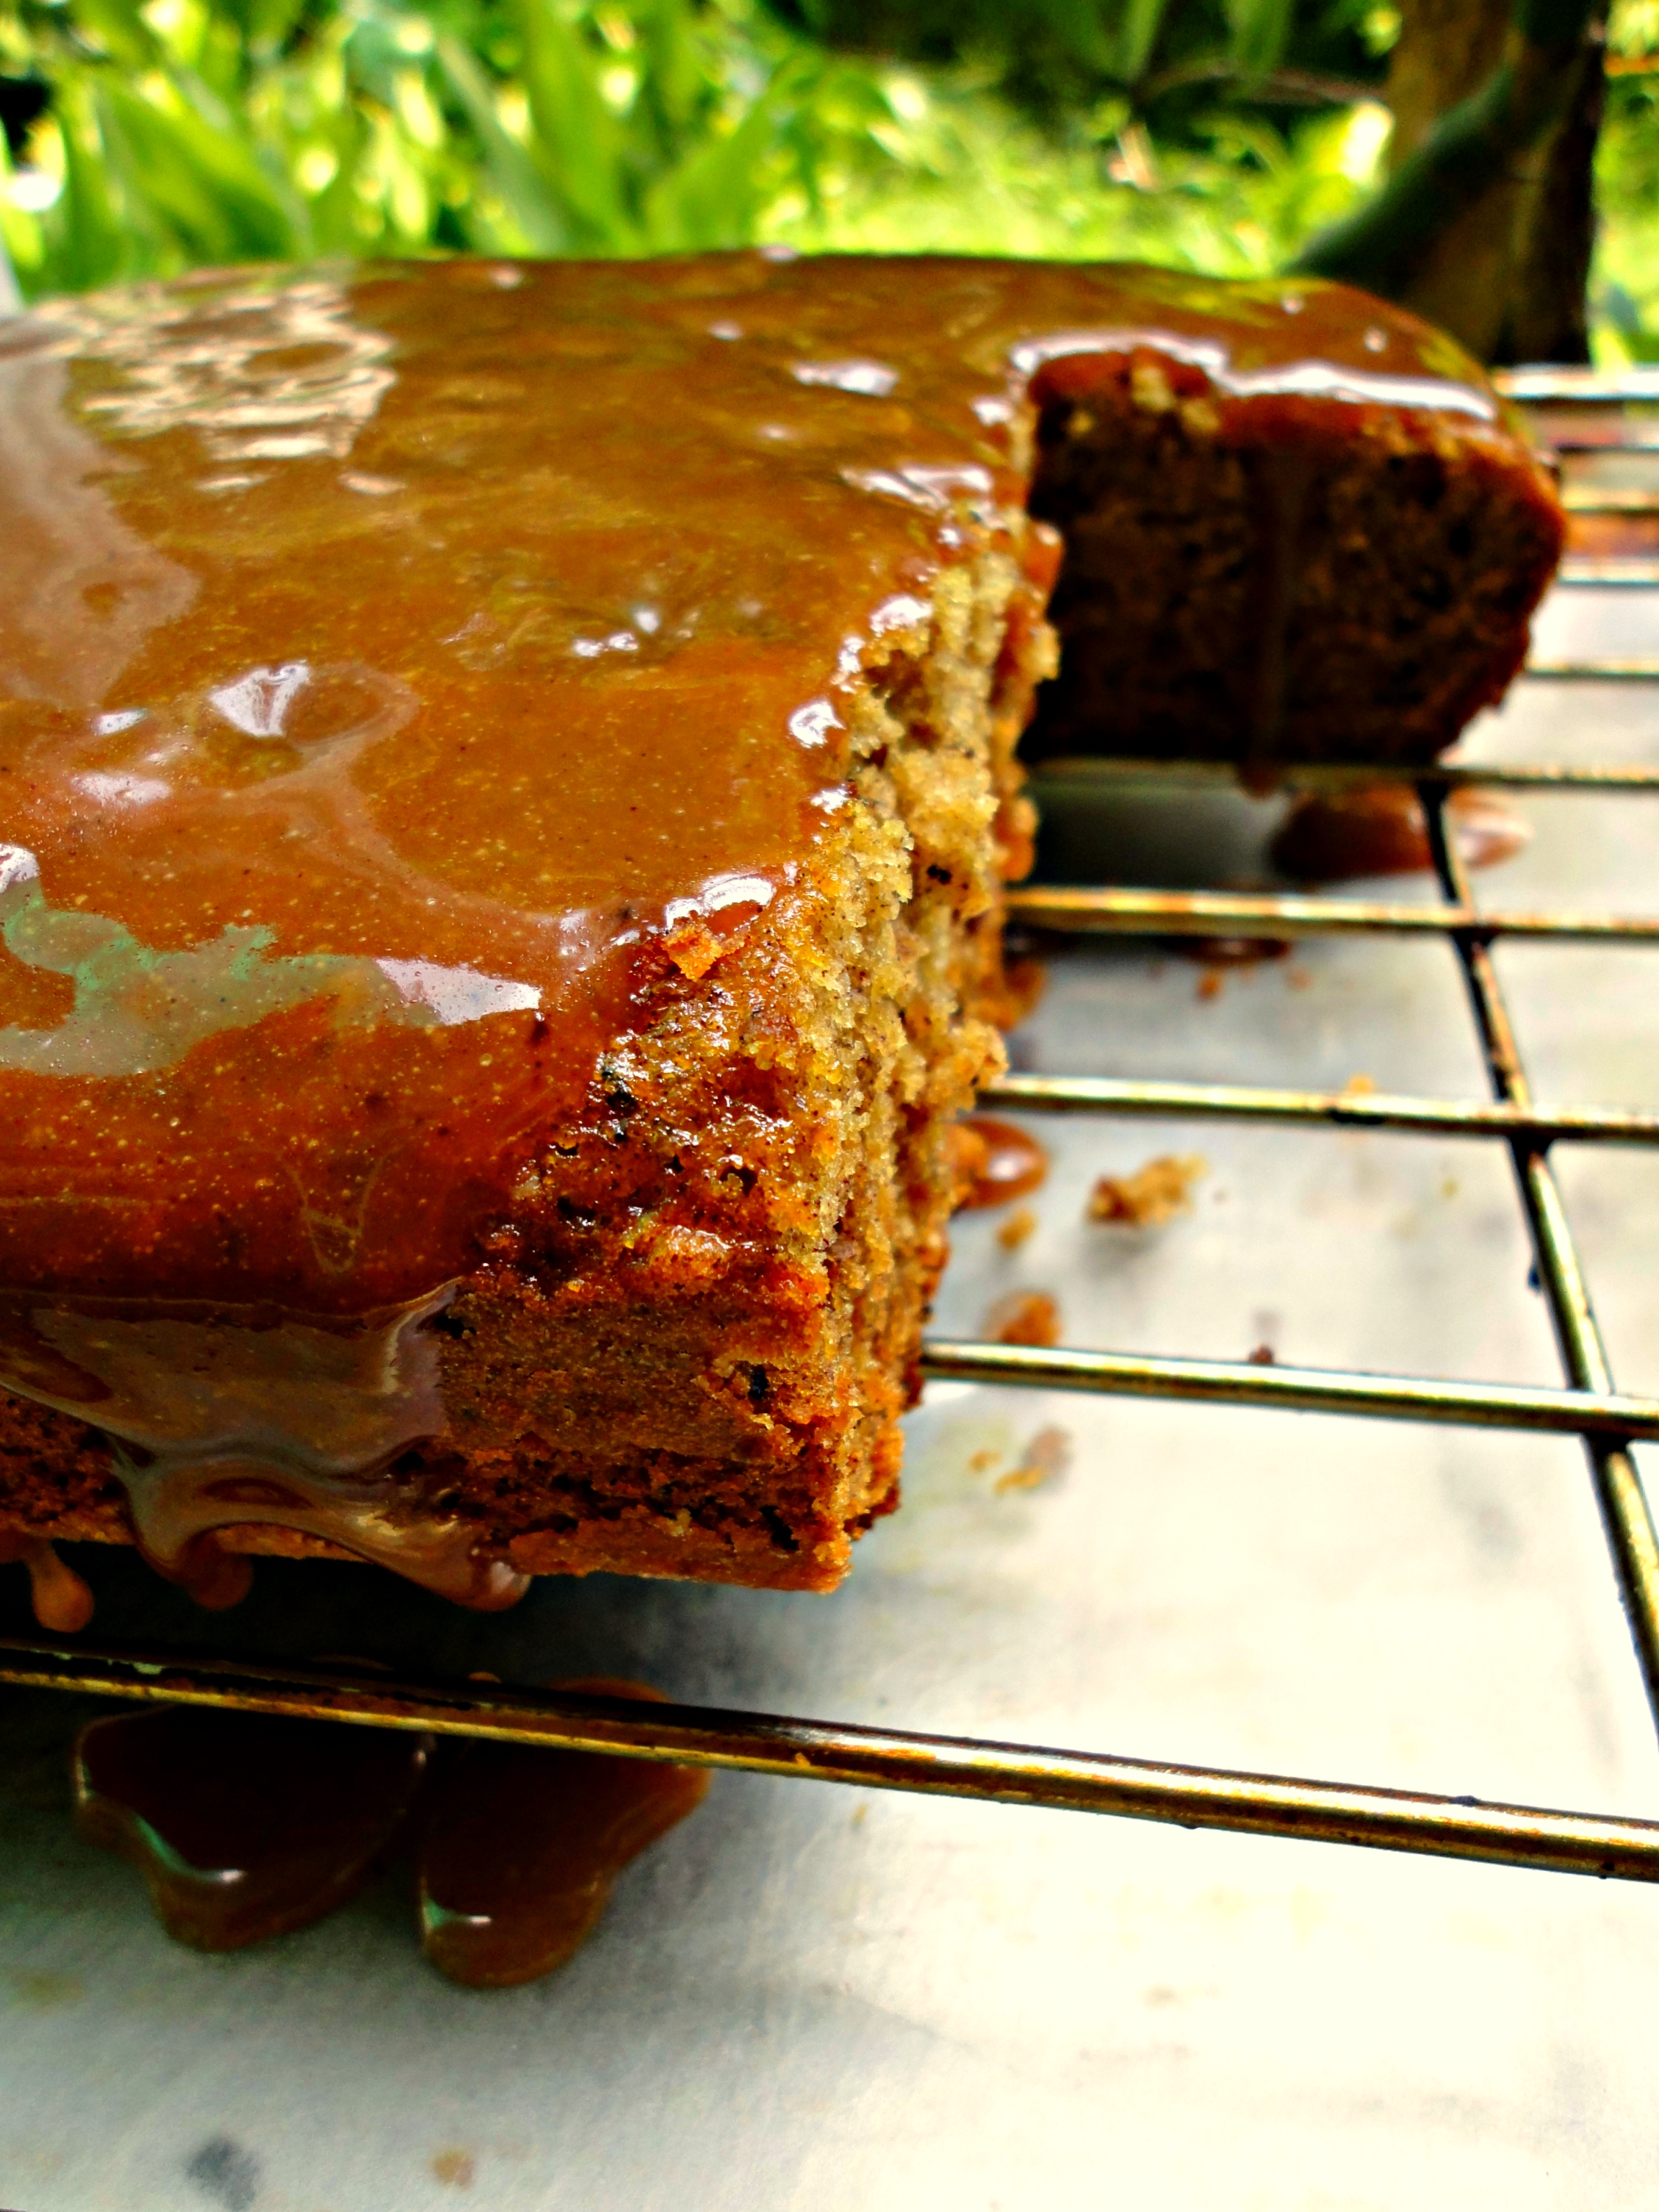
The end result was a beautifully moist yellow cake dotted with pops of blueberries. The tanginess from the lemon is noticeable but not overwhelming, and the blueberry flavor just bursts in your mouth!

Here are some of my tips that will help ensure you get the best results.

TOP TIPS

  1. Don’t overmix your batter especially once you add the blueberries.
  2. If using frozen blueberries, do not thaw them. Take them out of the freezer just before ready to use.
  3. Be sure to toss your blueberries in 1 flour before adding them to the batter.  This helps keep the blueberries from sinking to the bottom of the pan.
  4. For easy removal of the cake from the bundt pan, make sure you grease the pan liberally with softened butter, followed by a dusting of flour. Once you have floured every part of the pan, bang it on the counter a couple of times to dislodge any excess flour and dump. Once your cake is baked, let it cool for about 20 minutes or until you can comfortably place your hand on the side of the pan. The pan should still feel very warm. Flip onto a plate or cake stand and tap around the pan until you feel the cake come out.
  5. As with all baked goods, this cake tastes better the day after baking
  6. Store the cake in an airtight container at room temperature for upto a week.

LEMON BLUEBERRY BUNDT CAKE

(makes one bundt)

Ingredients

  • 2 3/4 cups all-purpose flour
  • 2 tsp baking powder
  • 1/4 tsp baking soda
  • 1/2 tsp salt
  • 1 2/3 cups granulated sugar
  • 2 Tbsp lemon zest
  • 200g unsalted butter, softened
  • 2 Tbsp vegetable oil
  • 4 large eggs , at room temperature
  • 1 cup buttermilk, at room temperature (1 cup milk mixed with 1 tbsp vinegar)
  • 2 Tbsp fresh lemon juice
  • 2 cups (295g) fresh or frozen blueberries

Directions

  1. Preheat the oven to 180°C. Grease a bundt pan liberally with softened butter, dust with flour and shake out excess, set aside. 
  2. In a mixing bowl whisk together flour, baking powder, baking soda and salt, set aside.
  3. In a large bowl, combine the sugar and lemon zest by rubbing them together with your fingers until fragrant. Add butter and oil, and whip mixture until pale and fluffy. 
  4. Blend in eggs one at a time. 
  5. In a measuring cup stir together buttermilk and lemon juice. 
  6. Add 1/3 of the flour mixture to the butter mixture and mix just until combined, then add in 1/2 of the buttermilk mixture and mix just until combined. Repeat the process with flour and buttermilk mixtures once more. Add the last 1/3 of the flour mixture and mix just until nearly combined.
  7. In a small bowl, toss blueberries with 1 Tbsp of flour. Then add the blueberries to the cake mix and fold gently (careful not to over-mix). 
  8. Scoop mixture into prepared bundt pan, spread evenly. Bake in a preheated oven for about 45-55 – 60 minutes, or until a wooden skewer inserted into the center comes out clean.
  9. Cool on a wire rack for 15 minutes then run a sharp knife around edges to ensure the cake is loosened and invert onto a wire rack. Cool on rack.
  10. Dust with icing sugar (optional) and cut yourself a big slice. Enjoy!

Notes: if using frozen blueberries, no need to defrost them. For more tips, see the recipe description above.

Caramel Apple Cake

Simple, homey, comforting apple cake

– the perfect tea time treat for fall.

It’s fall and the time of year when it just seems right to put apples and cinnamon in everything. And what goes perfectly with apples and cinnamon, why caramel of course!

Filled with apples and topped with a delicious caramel sauce, this cake is quick, easy and oh so good. It makes for the perfect fall treat with its warm cozy flavors.

You start off by making a simple oil based cake. Followed by folding in chunks of apples and toasted walnuts. Finish off by drizzling the mist freshly baked cake with a thick velvety caramel sauce, a sauce which literally takes minutes to make, and is SO good..

Caramel Apple Cake
Servings: 10-12
 
Ingredients:
 
Cake
·         2 cups all-purpose flour
·         ¼ tsp salt
·         ¾ tsp baking soda
·         ½ tsp cinnamon, optional
·         ½ cup walnuts chopped
·         1 cup vegetable oil
·         1 cup granulated sugar
·         2 eggs, at room temperature
·         ½ tsp vanilla
·         2 cups apples, peeled and chopped into 1/2″ thick pieces
 
Caramel Sauce
·         ½ cup brown sugar 
·         2 Tbsp milk 
·         45g salted butter 
 
Directions:
 
For the cake:
Preheat oven to 180˚C. Grease a 9-inch spring form pan or a Pyrex dish with butter or oil.
In a bowl, whisk together the flour, baking soda, cinnamon and salt. Set aside.
In a large bowl, beat the eggs, oil, vanilla and sugar on medium speed with an electric mixer until well blended.
Mix in the dry ingredients until just combined.
Using a wooden spoon, mix in the walnuts and the chopped apples.
Bake the cake until golden brown about 45 to 50 minutes or until a toothpick inserted comes out clean.
Once the cake is done, poke it all over with a fork or a skewer. Pour the prepared sauce over hot cake while still in the pan. Give the cake a few minutes to absorb the sauce before slicing and serving.
For the sauce:
1.       Place sauce ingredients into a small saucepan over medium heat. Stir constantly and bring it to a gentle boil. After it begins gently boiling, continue to stir and allow to cook for about three minutes on low heat. It should be loose and will lightly coat the back of a spoon.
 
Notes
·         You can choose not to use the caramel sauce. In that case, let the cake cool for 10 minutes, dust with icing sugar and serve.
·         I like to toast my walnuts before adding to the cake batter. To toast walnuts, simply heat them on low heat in a nonstick frying pan for a couple of minutes until they are light brown and fragrant.


The BEST Tres Leches Cake

A light and fluffy cake that is soaked with three milks and chilled until it is perfectly moist. Topped with whipped cream and fresh fruit, this cake makes for an irresistible dessert!

It makes for the perfect summer treat: sweet, refreshing, melt-in-your-mouth deliciousness, topped with whipped cream.

Tres leches cake is a popular cake in Mexico and Latin America.

It is an ultra-light sponge cake soaked in a sweet milk mixture–evaporated milk, sweetened condensed milk, and milk–hence the name “tres leches” which literally means “three milks”.

IMG_20200731_143933

The milks vary from recipe to recipe, but most recipes typically use a combination of sweetened condensed milk, evaporated milk, and either milk or cream.

You’d think that all that milk in the recipe would lead to a mushy cake. But when done right, the combination of the three milks creates the right amount of sweetness and texture for a rich, moist, but still light cake.

It makes for the perfect summer treat: sweet, refreshing, melt-in-your-mouth deliciousness, topped with whipped cream.

Tres leches cake. A light and fluffy cake that is soaked with three milks and chilled until it is perfectly moist.


Tres leches cake. A light and fluffy cake that is soaked with three milks and chilled until it is perfectly moist.

CAKE TIPS

  • The whipped egg whites in the batter make it extra light and spongy, so make sure you whip them well.

  • When adding the three-milk mixture make sure that you pour the mixture evenly and that you reach all the edges and corners of the cake.

  • After the sponge cake is soaked with the milks, top it with whipped cream and fresh fruit. I used peaches and mangoes, but you can use any fruit that is in season.

  • To whip cream, make sure the cream is really well chilled. For extra precaution, pop your metal mixing bowl and your beaters into the freezer half an hour before whipping cream.

  • Store Tres Leches Cake in the refrigerator after covering it with plastic wrap. It’s best to store this cake for several hours or overnight before serving so that the cake has a chance to soak up the milk mixture.

  • If you have leftovers, they can be stored, covered, in the fridge for up to 3-4 days.

Tres Leches Cake is one of the easiest cakes to make and it tastes DIVINE.

It’s sure to be a crowd-pleaser at your next party. Everyone will be coming back for seconds!

Tres leches Cake

Yields: 12 servings
Ingredients:
CAKE
·         1 cup (125g) all-purpose flour
·         1 1/2 tsp baking powder
·         1/4 tsp salt
·         5 large eggs, separated
·         1 cup (200g)  granulated sugar, divided
·         1 tsp vanilla extract
·         1/3 cup (81.3ml) whole milk
SYRUP
·         1 (14-oz.) can sweetened condensed milk
·         1 (12-oz.) can evaporated milk
·         1/2 cup (125ml) milk
TOPPING
·         300 ml cream
·         2 Tbsp granulated sugar
·         1 cup chopped peaches and mangoes to garnish, optional
Directions:
  1. For the cake: Preheat the oven to 180 °C and butter a 9×13 pyrex dish.
  2. In a large bowl, sift together the flour, baking powder, and salt. Set aside.
  3. In a separate bowl, beat egg whites on high speed until soft peaks form. With the mixer on, pour in 1/4 cup sugar and beat on high speed until egg whites are stiff and glossy. Set aside.
  4. In another bowl, beat egg yolks with 3/4 cup sugar with an electric mixer on high speed, until yolks are pale yellow (2-3 minutes). Mix in the milk and vanilla.
  5. Pour egg yolk mixture over the flour mixture and combine gently with a spatula.
  6. Gently fold in egg white mixture until just combined.
  7. Pour batter into prepared pan and spread to even out the surface and bake at for 30-35 minutes or until a toothpick comes out clean.
  8. For the Milk Syrup: In a large measuring jug or bowl, whisk together the sweetened condensed milk, evaporated milk, and whole milk.
  9. When the cake is cool, pierce the surface all over with a fork. Slowly drizzle the milk mixture over the cake.
  10. Make the Whipped Cream: Pour the cold cream and sugar into a large chilled mixing bowl and beat on high speed thick, whipped and spreadable. Spread over the cake with a spatula then decorate with fresh fruit if desired.
Notes
·         This cake is best served cold.
·         Leftovers can be stored covered, in the fridge for up to 3-4 days.
Recipe adapted from delish

More easy cake recipes:

Old-fashioned Banana Cake

Fresh Peach Cake

Iced Lemon Pound Cake


Fresh Peach Cake

A simple wholesome cake studded with fresh peaches and a crumbly topping.

This Fresh Peach Cake is the perfect way to show off the season’s juiciest peaches. Whether you pair it with a cup of tea or a dollop of cream, it will be hard to eat just one slice.

I love summer for all its bounty – the beautiful cherries, luscious mangoes, juicy melons just to name a few. But, I especially love peaches.

This recipe is a mashup of my Strawberry Cake and Peach Crumble Pie.

It is composed of a simple batter with peaches mixed in and some arranged on top along with a sprinkling of crumble that melts into the cake when baked and creates pockets of gooey deliciousness.

Nothing fancy, but oh so tasty!

This Fresh Peach Cake is the perfect way to show off the season’s juiciest peaches. Whether you pair it with a cup of tea or a dollop of cream, it will be hard to eat just one slice.

This Fresh Peach Cake is the perfect way to show off the season’s juiciest peaches. Whether you pair it with a cup of tea or a dollop of cream, it will be hard to eat just one slice.

Fresh Peach Cake

 Servings: 8-10
Ingredients:
Topping
·         1/4 cup (31g) all-purpose flour
·         1/4 cup (50g) packed brown sugar
·         1/4 tsp ground cinnamon
·         2 Tbsp (30g) butter, melted
·         2 large peaches, sliced thinly
·         optional: icing sugar for dusting
Cake
·         6 Tbsp (85 grams) butter, at room temperature
·         1 1/2 cups (188 grams) all-purpose flour
·         1 1/2 tsp baking powder
·         1/4 tsp salt
·         1 cup (200 grams) granulated sugar
·         1 large egg, at room temperature
·         1/2 cup (118 ml) milk, at room temperature
·         1 tsp (5 ml) vanilla extract
·         1 large peach, peeled and chopped into small chunks
Directions:
  1. Preheat oven to 180˚C. Grease a round Pyrex dish or a 9 inch cake pan
  2. Make the topping: With a fork, mix the flour, brown sugar, and cinnamon together. Stir in the melted butter until crumbs form. Set aside.
  3. Make the cake: In a bowl, whisk together the flour, baking powder, and salt. Set aside.
  4. In a large bowl, beat butter and sugar until pale and fluffy with an electric mixer, about 3-5 minutes.
  5. Mix in egg, milk and vanilla until just combined.
  6. Add dry mixture gradually, mixing until just smooth. Stir in the chopped peaches.
  7. Transfer batter into prepared pan and smooth with spatula.
  8. Arrange sliced peaches on top of batter, in a single layer. Sprinkle the crumb topping on top.
  9. Bake cake until golden brown about 45 to 50 minutes. Let cool in pan before slicing. Dust with icing sugar and serve.

Old-fashioned Banana Cake

Quick and easy: the perfect tea-time snack!

Easy banana cake recipe makes for the absolute best banana cake you’ll ever try. It’s moist and fluffy, packed with banana flavor with an added punch from the cinnamon.

Typically, having a bunch of overripe bananas lying around means only one thing in our house… Banana bread! But I decided to switch things up this time around and make a Banana Cake instead.

This easy banana cake recipe makes for the absolute best banana cake you’ll ever try. It’s moist and fluffy, packed with banana flavor with an added punch from the cinnamon. Perfect for teatime or snacking!

asy banana cake recipe makes for the absolute best banana cake you’ll ever try. It’s moist and fluffy, packed with banana flavor with an added punch from the cinnamon.

Tips for Making this Banana Cake

  • Use dark, spotty bananas for a pronounced banana flavor, and to ensure your cake is deliciously moist.
  • Make sure you’re using room temperature ingredients. This ensures everything mixes together evenly without over mixing.
  • Don’t over mix the batter, otherwise it can get tough. This will help create a tall, light cake.
  • I used an 8 inch square cake pan but a round pan would work too.
  • This cake is perfect on its own or frosted with a layer of Nutella. You can even drizzle the cooled cake with Caramel Sauce.
  • The baked cake can be stored in an airtight container at room temperature or in the fridge. If the cake is frosted then it definitely should be refrigerated.
  • You can add a cup of toasted walnuts to the batter for an added texture.

asy banana cake recipe makes for the absolute best banana cake you’ll ever try. It’s moist and fluffy, packed with banana flavor with an added punch from the cinnamon.

If you have got a bunch of overripe bananas lying around – then I highly recommend you skip the banana bread and make this simple moist banana cake. It is tender, comfy, and has a delicious hint of cinnamon.

For more banana recipes – try these other favorites:


Old-fashioned Banana Cake

Serves 10-12
Ingredients:
·         ½ cup (120g) butter, softened
·         ¾ cup (150g) granulated sugar
·         2 eggs, at room temperature
·         1 cup mashed banana (3 large bananas)
·         1/2 tsp vanilla essence
·         1 tsp baking soda
·         2 Tbsp hot milk (heat in microwave for 20 secs)
·         1¾ cup (220g) all-purpose flour (leveled)
·         1 tsp cinnamon powder
·         1 tsp baking powder
·         Nutella for topping *optional
Directions:
  1. Preheat oven to 180°C. Grease an 8 inch cake pan and line the base with wax paper.
  2. Beat butter and sugar until light and fluffy, about 3-5 minutes.
  3. Beat in eggs one at a time. Stir in bananas until combined.
  4. Mix baking soda and hot milk together before stirring into the banana mixture.
  5. Sift in flour, cinnamon and baking powder; fold into the mixture until combined.
  6. Spoon mixture into prepared pan and smooth the top.
  7. Bake for 40-45 minutes until cooked (insert a toothpick, if it comes out clean it is cooked).
  8. Let the cake stand for 5-10 mins before inverting onto a wire rack to cool. Frost with Nutella if desired.


Simple Strawberry Cake

A fresh, light (yet dense!), and incredibly moist cake – the perfect treat to bake during quarantine, and enjoy with a cup of tea.

This cake comes together really easily with ingredients you more than likely already have in your kitchen. It is also an excellent way to make use of the juicy strawberries in season.

I also got to use my heart shaped pan, which I often feel gets neglected.

Do not do what I did, which is to try and tip out the cake from the pan!

This cake is way too delicate to be removed from a regular cake pan. Please use a spring from pan with a removable bottom or use any pie dish and serve the cake straight from it.

Delicious moist strawberry cake.

Here are some other juicy strawberry bakes you might like:
Strawberries and Cream Sponge Cake
Buttermilk pancakes with strawberry compote

Stay home, stay safe, and bake on.
xxx

 Simple Strawberry Cake

 Servings: 8-10
Ingredients:
·         6 tablespoons (85 grams) unsalted butter, at room temperature
·         1 1/2 cups (188 grams) all-purpose flour
·         1 1/2 tsp baking powder
·         1/4 tsp salt
·         1 cup (200 grams) plus 2 tablespoons (25 grams) granulated sugar
·         1 large egg, at room temperature
·         1/2 cup (118 ml) milk
·         1 teaspoon (5 ml) vanilla extract
·         1 pound (450 grams) strawberries, hulled and halved
Directions:
  1. Preheat oven to 180˚C. Grease a 9 or 10-inch baking pan or Pyrex dish with butter or oil. Line the bottom with parchment or wax paper.
  2. In a bowl, whisk together the flour, baking powder, and salt. Set aside.
  3. In a large bowl, beat butter and 1 cup sugar until pale and fluffy with an electric mixer, about 3-5 minutes.
  4. Mix in egg, milk and vanilla until just combined.
  5. Add dry mixture gradually, mixing until just smooth.
  6. Transfer batter into prepared pan and smooth with spatula.
  7. Arrange strawberries, cut side down, on top of batter, in a single layer. Sprinkle remaining 2 tablespoons sugar over berries.
  8. Bake cake until golden brown about 50 to 60 minutes. Let cool in pan before slicing.
Notes
* If using salted butter, reduce the amount of salt to a ¼ tsp.
**Leftovers can be stored at room temperature, loosely covered, for up to 2 days.
Recipe adapted from Martha Stewart

CUPCAKE MASSACRE {Halloween Special}

Happy Halloween errybady!

It’s not that late to whip up a batch of these scary yet cute cupcakes.

Cupcake Massacre. This would make for a perfect centerpiece for a Halloween celebration!


Halloween or not, these cupcakes make for an adorable treat minus the blood splatters.

And they’re super easy too.

Cupcake Massacre. This would make for a perfect centerpiece for a Halloween celebration!

Here’s what you need to make this cupcake massacre for your Halloween party:

Cupcakes

I posted a recipe of my favorite chocolate cupcakes just a few days ago. You can find the recipe HERE. They’re super moist, fudgy and will make for the perfect base for all the spooky décor on top.

Frosting

I used my recipe for Buttercream frosting I posted years ago for all the cupcakes. Buttercream is light and creamy and holds its shape perfectly for piping.

Recipe: HERE and HERE

Owl Cupcakes


These wide eyed Owl Cupcakes make for an adorably gory Halloween treat!

You will need:

Chocolate Frosting

Red M&Ms

Chocolate chips or chocolate M&Ms

Oreos

Method:

  1. Spread chocolate frosting on top of the cupcake.

  2. Push two Oreo wedges into the top edge of the cupcake to make the ears.

  3. Top with two whole Oreo halves, icing side up for eyes. Dot the bottom of two chocolate chips or chocolate M&Ms with frosting and place on top of Oreo halves for eyeballs.

  4. Place a red M&M in the center for the nose.

Cookie Monster Cupcakes


Gashed up cookie monster cupcakes

You will need:

Blue tinted Frosting (using Americolor Sky Blue Food Coloring)

Plain White frosting

Chocolate Chip Cookies

Mini Chocolate Chips

Multi-Opening Decorating Tip (Wilton Cake Decorating Tip 233)

Plain round piping tip

Disposable Piping Bag

Method:

  1. Spread a thin layer of blue frosting on top of the cupcake

  2. Fill a piping bag fitted with the multi-opening piping tip and fill it with the remaining blue frosting

  3. Make the Cookie Monster’s fur by applying even pressure to the piping bag and pulling directly up. (Watch this tutorial for a better idea) Cover the entire top of the Cookie Monster Cupcake with blue fur.

  4. Pipe small dots of plain white frosting as the two eyes. Place a mini chocolate chip on each as eyeballs.

  5. Stick one half of a chocolate chip cookie into the frosting to represent the Cookie Monsters’ mouth.

(on some cupcakes, I used the white part of an Oreo as the base of the eyes. But I think the white frosting looks better)

Bloody Broken Glass Cupcakes

*Inspired by the awesome Scran Line

Broken glass cupcakes with gashes and dribbles of blood.

You will need:

Grey tinted Frosting (using Wilton Black Food Coloring)

Edible Blood

2 Tbsp. granulated sugar

1 M Wilton round Piping Tip

Disposable Piping Bag

Rice Crispies

Method:

  1. To prepare the sugar glass, melt the sugar in a pan over medium high heat till it starts changing color (do NOT stir). Pour onto a greased dish, throw on top some sugar crystals for a jaded effect and set aside to harden.

  2. Transfer the frosting into a piping bag fitted with a round piping tip. Pipe swirls of frosting onto the cupcake.

  3. Using a knife, make gashes into the piped frosting. Drizzle the edible blood on top and let it trickle down the gashes.

  4. Top with shards of the prepared sugar glass.

Bloody cupcakes with maggots and gashes.

Or throw on some maggots aka Rice Crispies.

Bloody cupcakes with maggots and gashes.

Group them together.

Drizzle spatters of blood on top and there you have it!

Your very own cupcake massacre.

Cupcake Massacre. This would make for a perfect centerpiece for a Halloween celebration!


This would make for a perfect centerpiece for a Halloween celebration!

It’s definitely an attention grabber.

Super Moist Chocolate Cupcakes with Chocolate Frosting

I’ve made a lot of cupcakes in my time. Some using one egg, two eggs, some with no eggs. Some with butter, some with oil. Some with coffee, some without.

I’ve tried all kinds of variations in the hope of finding the perfectly moist, melt-in-your mouth chocolate cupcake.

And trust me when I tell you, I have finally found my favorite version to share with you.

This is it!

Moist chocolate cupcakes topped with a fudgy chocolate frosting

This ridiculously easy, no mixer-needed recipe takes literally minutes to put together. And the result you ask? Sheer perfection.

Rich, moist, indulgent, and deliciously chocolatey; the perfect base for a big swirl of frosting.

Moist chocolate cupcakes topped with a fudgy chocolate frosting


Moist chocolate cupcakes topped with a fudgy chocolate frosting

These cupcakes pair well with all kinds of different flavors;

  • Peanut butter

  • Oreos

  • Peppermint

  • Salted caramel!!

But chocolate on chocolate is my favorite way to go.


Moist chocolate cupcakes topped with a fudgy chocolate frosting

This frosting is a Chocolate Fudge Buttercream: rich, fudgy whipped buttery goodness. It’s making my mouth salivate just writing about it…

Its dark, creamy and o’so dreamy.

This frosting will BLOW. YOUR. MIND.

The chocolate cupcakes are made with cocoa. The flavor is very dark, but not bitter in the least.

Then the combination of oil, coffee & buttermilk makes these cupcakes super moist. The cupcakes in no way taste of coffee. The hot coffee just helps the cocoa “bloom” and develop the intense chocolate flavor making them darker and richer.

Moist chocolate cupcakes topped with a fudgy chocolate frosting

Important tip!!
Make sure you fill the cupcake liners only 2/3 of the way full. Not ½ or all the way to the top.

Cupcake conundrums

Overfilling will lead to overflowing of the batter and result in flat mushroom tops.

Underfilling will result in tiny cupcakes with an unappealing overhang of the cupcake liner

If you want the perfectly risen cupcake…2/3 is the way to go!


Moist chocolate cupcakes topped with a fudgy chocolate frosting

Everyone should have a classic chocolate cupcake recipe in their life.

This is mine.

.

.

.

Hope you love it as much as I do.

If you do try it, post a photo on Instagram with the hashtag #spatulainmypocket

I love to see all your creations 🙂

Chocolate Cupcakes with Chocolate Frosting

Prep Time: 5 minutes                                                                        Yields: 12 cupcakes
Cook Time: 15 to 18 minutes
Ingredients:
Chocolate Cupcakes
3/4 cup flour
3/4 cup granulated sugar
1/4 cup cocoa powder
3/4 teaspoon baking soda
3/4 teaspoon baking powder
3/4 teaspoon cornflour, leveled
1/2 teaspoon salt
1/3 cup buttermilk, at room temperature1
1/4 cup hot coffee2
3 Tablespoon oil
1 egg, at room temperature
1 teaspoon vanilla extract


Chocolate Frosting
6 tablespoons (90g)  butter, softened to room temperature
2 and 1/2 cup icing’ sugar
2/3 cup cocoa powder
1 teaspoons vanilla extract
4-6 Tablespoons milk


Directions:
For the cupcakes: Preheat oven to 180 degrees C.
Line a cupcake pan with liners.
In a large bowl; whisk together flour, sugar, cocoa powder, baking soda, baking powder, cornflour, and salt.
In another bowl, whisk together the milk, coffee, oil, egg, and vanilla extract.
Pour the wet ingredients into the dry while whisking vigorously; batter will be thin. (Pouring batter into a measuring jug makes it much easier to distribute into the cupcake pan.)
Portion out batter into cupcake tins.
Bake for 15-18 minutes, until springy to the touch.
Allow to cool completely.
For the frosting: Using an electric mixer, beat the butter on high speed until smooth and creamy. Turn speed to low and slowly add the sugar, and the cocoa powder. Add tablespoons of milk in between. Beat until sugar/cocoa are absorbed into the butter, about 2 minutes. Turn mixer to medium speed and add the vanilla extract. Turn the mixer to high speed and beat till frosting is smooth and shiny. Add more milk if frosting is stiff. Add more sugar if frosting is too loose.
Pipe or spread the frosting onto the cooled cupcakes. Top with sprinkles if desired.
These cupcakes are best at room temperature and can be stored in the refrigerator for up to 5 days.
Notes
1.      Homemade buttermilk: ¼ tsp vinegar + 1/3 cup whole milk.
2.    I use a ¼ cup boiling water mixed with a ¼ tsp of instant coffee granules.


Iced Lemon Pound Cake

October has begun and so has fall. The avalanche of pumpkins, apples and cinnamon has already hit us. And here I am…still hanging onto my summer desserts.

This super tender, delicious lemon pound cake makes for a perfect evening snack.


I’m not ashamed of it. Not one bit. I would gladly eat a slice of this moist, buttery lemon cake any day of the year.


This super tender, delicious lemon pound cake makes for a perfect evening snack.


I love my monstrous frosted layered cake creations but sometimes, just sometimes, I crave the comfort of a simple, homely, fresh out of the oven cake. A cake that doesn’t ask for planning or fancy detailing. A cake that can be whipped up in minutes.

This lemon pound cake is just that.

Simple, delicious, and ridiculously easy to make.


This super tender, delicious lemon pound cake makes for a perfect evening snack.

It has a soft, fluffy, moist texture with a bright lemon kick from the tangy glaze on top. It’s buttery and lemony and it literally melts in your mouth. And it couldn’t be easier to make.

This super tender, delicious lemon pound cake makes for a perfect evening snack.

Here are some tips to remember:

  1. A pound cake gets its fine, dense (not heavy) texture from the all the mixing. The mixing incorporates air, creating volume, which then levels the loaf. So make sure you beat the sugar and butter well and again after the addition of each egg.

  2. Buttermilk gives you a moist, flavorful cake. The acidity in the buttermilk reacts with the baking powder making the cake lighter in texture. To make homemade buttermilk; combine ½ cup whole milk with 1 teaspoon vinegar or lemon juice.

  3. The cake gets most of its flavor from the lemon zest so make sure you do not skimp on the zest. Only use the thin, yellow zest layer of the lemon, which contains the lemon oils, and avoid the white layer which tastes bitter.

  4. Grease your loaf pan very well. I like to oil the pan, line the bottom with a piece of parchment paper, and then coat the pan with flour. This ensures that the cake will pop right out of the pan in one piece.

Once the cake is slightly cooled, I like to top it off with a thick lemon glaze. The glaze gives the cake a burst of citrus flavor and takes on a beautiful almost matte finish once it hardens.


This super tender, delicious lemon pound cake makes for a perfect evening snack.

It has become go-to lemon pound cake recipe. Maybe it will become yours too. 🙂

Lemon Pound Cake

Prep Time: 15 minutes                                                                        Yields: one 9 inch loaf
Cook Time: 45 to 55 minutes
Ingredients:
For the cake:
1 1/2 cups all-purpose flour
1 teaspoon baking powder
Zest of 1 lemon (around 1 teaspoon)
1/2 tsp salt
1/2 cup (115g) unsalted butter, soft at room temperature
1 cup granulated sugar
2 large eggs, room temperature
1 teaspoon vanilla extract
1 Tablespoon fresh lemon juice
1/2 cup buttermilk, room temperature (see notes below)
For the glaze:
1 cup icing sugar, sifted
1 1/2 Tablespoon lemon juice
1 Tablespoon milk
Directions:
Preheat oven to 180 degrees C.
Butter a 9 x 5 x 3 inch loaf pan. Dust with flour, shake off the excess.
In a bowl combine the flour, baking powder, and salt. Set aside.
In a large bowl, rub the lemon zest into the sugar. Add in the butter and beat with a hand mixer at medium-high speed until pale and fluffy, about 4-5 minutes. Add the eggs, one at a time, beating well after each addition. Add in the vanilla and lemon juice. Scrape the sides of the bowl.
With the mixer on low, add about one-third of the flour mixture and mix until almost combined, then add half the buttermilk and mix until just combined. Repeat with another third of flour mixture and then the last half of the buttermilk, ending with the last third of the flour. Beat until just incorporated.
Pour the batter into the prepared pan and smooth the top. Bake for about 45 – 55 minutes or until the cake is golden brown and a toothpick inserted in the center comes out clean.
Remove the cake from the oven and let it cool for about 10 – 15 minutes. Then remove the cake from the pan to finish cooling before glazing.
Meanwhile make the glaze; combine all the glaze ingredients, start with 1 tbsp lemon juice and milk and add the remaining lemon juice as needed. The icing should be thick and smooth. Add more lemon juice or powdered sugar if needed to get the correct pouring consistency. Slowly pour the glaze over the top of the cake. Let it dry before slicing the cake.
Notes
1.       Homemade buttermilk: ½ cup milk + 1 tsp vinegar
2.       This cake will keep about 4 days at room temperature or upto one week in the refrigerator.

This super tender, delicious lemon pound cake makes for a perfect evening snack.

Death by Chocolate Cake + World Chocolate Day!

4 years of college. Over and done with.
More on that later…

LET’S HAVE CAKE TO CELEBRATE.

3 layers of rich moist chocolate cake, sandwiched with a dreamy creamy chocolate fudge frosting, and topped with drizzles of smooth lush chocolate ganache.

3 layers of rich moist chocolate cake, sandwiched with a dreamy creamy chocolate fudge frosting, and topped with drizzles of smooth lush chocolate ganache.

It is World Chocolate Day after all. And it’d be rude not to indulge in chocolate (not that I do it everyday? Those last 4 jars of Nutella. Nop. Not me.)

3 layers of rich moist chocolate cake, sandwiched with a dreamy creamy chocolate fudge frosting, and topped with drizzles of smooth lush chocolate ganache.

This is hands down the best chocolate cake you will ever taste.

It is super easy to make; no fancy equipment, no complicated ingredients needed. Just two bowls and a whisk (a mixer, if you’re me).

3 layers of rich moist chocolate cake, sandwiched with a dreamy creamy chocolate fudge frosting, and topped with drizzles of smooth lush chocolate ganache.

I went for the naked cake look because my family isn’t too big on frosting. Also, I think naked cakes look prettier.

I used my rusty 6-inch cake pan for a taller cake. And topped it all off with some of these beautiful flowers from the garden.

Some tips to make sure your cake turns out perfect every single time:

  • Make sure the eggs and milk are at room temperature. Makes a world of difference! Trust me

  • DIY Buttermilk: 1 cup whole milk (at room temperature) + 1 Tbsp white vinegar or lemon juice

  • Butter at room temperature for a smooth, cream frosting is a MUST. It should be soft but not too soft that’s its melting and has an oily sheen to it

  • No, sugar crushed in a grinder will not work for the frosting

3 layers of rich moist chocolate cake, sandwiched with a dreamy creamy chocolate fudge frosting, and topped with drizzles of smooth lush chocolate ganache.

Try this cake for the next birthday party, anniversary, World Chocolate Day — it’s a show-stopper!

Death by Chocolate Cake

Ingredients:
Chocolate Cake
·         1 and 3/4 cup all-purpose flour
·         1 and 3/4 cup granulated sugar
·         3/4 cup cocoa powder
·         1 tsp baking powder
·         2 tsp baking soda
·         1/2 tsp salt
·         1 cup buttermilk, at room temperature1
·         1/2 cup vegetable oil
·         2 large eggs, at room temperature
·         1 tsp vanilla extract
·         1 cup freshly made strong hot coffee2
 
Chocolate Fudge Frosting
  • 250g butter
  • 3-4 cups icing sugar
  • 3/4 cup cocoa powder
  • 3 Tbsp. heavy cream
  • 3-5 Tbsp. whole milk
  • 1 tsp vanilla extract
Ganache for the drip
·         1/2 cup  cream
·         1/2 cup semi-sweet chocolate chips
Fresh flowers for the top


Directions:
1.       Preheat oven to 180C degrees. Grease & flour three 6 inch round cake pans3, and line them with parchment paper.
2.      For the cake: In a bowl, whisk together hot coffee and cocoa till a thick mix forms. Set aside to cool.
3.      Sift together the flour, baking powder, baking soda, and salt in a medium sized bowl. Set aside.
4.      In a large bowl, using a handheld mixer, whisk the eggs and sugar till a bit pale in color. Mix in the buttermilk, oil, and vanilla until combined. Slowly add the dry ingredients to the wet ingredients with the mixer on low. Add the coffee cocoa mixture. Mix until combined.
5.      Divide the batter into prepared baking pans and bake for 20-25 minutes or until a toothpick inserted in the center comes out clean. Cool completely before frosting.
6.      For the frosting: In a large bowl, sift together the icing sugar and cocoa powder.
7.      In another bowl, using a handheld or stand mixer fitted with a paddle attachment, beat the butter on high speed until smooth and pale in color. With the speed on low, add in half of the sugar and the cocoa powder. Beat till combined. Then add in the rest of the sugar/cocoa mix. Turn mixer to medium speed and add the vanilla, cream and milk tablespoon by tablespoon. Turn the mixer to high speed and beat for 1 minute. Add more icing sugar if too lose or add more milk if too thick.
8.     For the ganache: In a small saucepan over medium heat, bring the heavy cream to a simmer (or microwave till hot). Remove from heat and add chocolate. Let sit for about 5 minutes, then whisk until smooth. Allow ganache to cool and thicken for about 30 minutes.
9.      Assemble the cake: Place 1 layer, flat side up, on a plate. With a palette knife or offset spatula, spread the top with frosting. Place the second layer on top, spread with frosting. Place the third layer on top, plain side up, and spread the frosting evenly on the top and sides of the cake. Scrape off the excess frosting for the ‘naked cake’ look I went for. Place cake in the fridge till cool to the touch. Then, pour over the top the chocolate ganache, let it drip round the edges. Top with fresh flowers, and enjoy!
Notes
1.       DIY Buttermilk: 1 cup whole milk (at room temperature) + 1 Tbsp. white vinegar or lemon juice
2.      I use 1 cup boiling water + 1 tsp instant coffee
3.      You can use two 8-inch or two 9-inch cake pans instead too


3 layers of rich moist chocolate cake, sandwiched with a dreamy creamy chocolate fudge frosting, and topped with drizzles of smooth lush chocolate ganache.

Meringue Ghosts [Halloween Special]

“By the pricking of my thumbs,
Something wicked this way comes.”

-William Shakespeare, Macbeth

Meringue Ghosts. They’re crunchy on the outside, and soft and mallowy on the inside.

It’s finally Hallow’s eve!

This post is quite accidental to be honest. I hadn’t planned on doing a Halloween special this year what with being swamped with college stuff, cake orders, and buddy nonsense.

Meringue Ghosts. They’re crunchy on the outside, and soft and mallowy on the inside.

I had an ignored Chocolate Cake lying in my fridge; plain top, frosted with chocolate buttercream, and chocolate drips on the sides. If you have ever tried my classic chocolate cake, you’d know that you end up with one lone egg white because the recipe calls for 2 whole eggs and 1 egg yolk.

Meringue Ghosts. They’re crunchy on the outside, and soft and mallowy on the inside.


And that one egg white is the reason why we have a Halloween post this year!  😀 It’s nothing like last year’s grand spectacle where we murdered a Red Velvet Cake and loved every minute of it. :3 But its awesome nonetheless!!

Meringue Ghosts. They’re crunchy on the outside, and soft and mallowy on the inside.

That one egg white has been used to make ghosts to adorn the cake with. Cute little meringue blobs together with their chocolate ball eyes made for adorable ghost toppers. The whole idea came out exactly as I had pictured.

The meringue ghosts were super easy to make; just three ingredients, four if you want to stretch it. The only thing I’d impress upon is ‘patience’. Patience when:

-beating the meringue to make it stiff and glossy, takes 3-5 minutes.

-baking the meringue till it easily peels off the parchment paper, round 60-90 minutes

-letting the meringues dry, round 2-3 hours

Other than that, they’re a breeze to make. This recipe only makes 10-12 meringue ghosts, just enough to top a cake with. But you can easily double the recipe to make more. Just remember the meringue code; for each egg white, use 1/4 cup caster sugar.

That is, if you’re using:

  • 1 egg white: ¼ cup sugar

  • 2 egg whites: ½ cup sugar

  • 3 egg whites: ¾ cup sugar

  • 4 egg whites: 1 cup sugar

And so on…

Meringue Ghosts. They’re crunchy on the outside, and soft and mallowy on the inside.


Do give these tiny ghost buddies a try. They’re crunchy on the outside, and soft and mallowy on the inside.

Happy Halloween!

Meringue Ghosts

Prep Time: 10 minutes                                                                        Yields: 10-12 cookies
Cook Time: 60-90 minutes
Ingredients:
·         1 large egg white
·         Pinch of cream of tartar, optional
·         1/4 cup caster sugar
·         1/4 tsp vanilla extract
·         Mini chocolate chips
Directions:
  1. Preheat oven to 105°C. Line a baking sheet with parchment paper.
  2. In a large bowl with an electric mixer, beat the egg white, cream of tartar and vanilla on medium speed until frothy.
  3. Gradually add in sugar and increase mixer to medium-high speed. Beat egg whites until stiff peaks form; about 3 minutes.
  4. Spoon meringue into a piping bag fitted with a round tip.  Pipe a blob on blob of meringue onto prepared baking sheet (three blobs in total). Add mini chocolate chips for eyes.
  5. Bake in preheated oven for about 1.5 hours or until the meringues are dry and crisp to the touch. Turn off the oven and allow the meringue ghosts to continuing drying in the oven for a few hours.
  6. Ghosts will keep in an airtight container at room temperature for up to 3 days.

Meringue Ghosts. They’re crunchy on the outside, and soft and mallowy on the inside.

The Fluffiest Pancakes You Will Ever Eat

Thick, fluffy, downright delicious. This is the only pancake recipe you need!

The Fluffiest Pancakes You Will Ever Eat

What’s better on a weekend than to sit home in your pajamas and eat a stack of fluffy pancakes doused in chocolate syrup?


The Fluffiest Pancakes You Will Ever Eat

And could there be anything better than pancakes to start your Eid holidays with?

Not really.


The Fluffiest Pancakes You Will Ever Eat

These pancakes are so light, so fluffy I could die!

A whole batch takes just minutes to whip up. Serve them smothered in Nutella, maple syrup, or jam; they’re awesome either way. Make these today, tomorrow, every day!

xoxo, Noor

Fluffy Buttermilk Pancakes

Yields: 13-15 pancakes
Ingredients:
1 ¼ cup all-purpose flour
2 teaspoons baking powder
1 Tablespoon granulated sugar
¼ teaspoon salt
1 cup buttermilk1
1 egg
1 Tablespoon melted & cooled butter or vegetable oil
Directions:
In a medium bowl, whisk together the flour, baking powder, sugar and salt. Whisk in the buttermilk, egg and melted butter, just until all mixed together (small lumps are fine, DON’T OVERMIX).
Heat a large, nonstick pan over medium-heat and lightly brush with oil or butter. Using an ice cream scoop (or any large spoon) add the batter to the pan. Cook the pancake for 2 to 3 minutes, or until the bubbles begin popping on top of the pancake and it’s golden brown on the bottom. Slide a thin, wide metal spatula underneath the pancake and gently but quickly flip it over. Cook an additional 1 to 2 minutes, until the other side is golden as well. Repeat with the remaining pancake batter.
Serve pancakes immediately topped with a drizzle of maple or chocolate syrup. Enjoy
Notes:
1.        DIY Buttermilk: 1 cup milk + 1 Tbsp vinegar. Mix and let it sit for 10 minutes. Mix well and use.
*To achieve smooth brown pancakes, don’t grease the pan after every single pancake. Grease it after every third pancake. Hope that makes sense.


nnnn

1st Blogiversary + CHOCOLATE CAKE

Classic Chocolate Cake with Swiss Meringue Buttercream on Spatula in My Pocket's 1st Blogiversary

This time last year, I sat with my laptop; editing, tweaking, hesitating and finally hitting ‘publish’on the first post on spatulainmypocket.com. *dundundun*

With that one click, I gave permission to everyone in the world to read what I had written and see what I had made. That’s the day Spatula in My Pocket was truly born. It started as a hobby and in the space of an year, has become a part of my identity. A part that I am immensely proud of. So, in this post I am going to indulge myself and talk about my magnificent journey so far (lots more to come, InshaaAllah!)

There is special surprise at the end for you, so start scrolling!

Classic Chocolate Cake with Swiss Meringue Buttercream on Spatula in My Pocket's 1st Blogiversary

Spatula in My Pocket has opened new worlds to me, found me new friends, a sense of purpose, and above all, it has given me confidence to overcome the crushing fear of failure and TO TRY.

The year has passed by so quickly.

From interviews, shoutouts, being mentioned in Buzzfeed, Parade Magazine, winning the Foona best blogger competition and baking bazillion cakes. This year has been a roll coaster ride.

Classic Chocolate Cake with Swiss Meringue Buttercream on Spatula in My Pocket's 1st Blogiversary

Some of my favorite posts from this year have been:

This decadent red velvet cake with whipped cream cheese frosting + its Halloween rendition

An all-time family favorite, Chicken Karhai

S’mores. Brownies. PIE. >>> S’mores Brownie Pie

First post, the rich gooey molten lava cake

Chocolate Chip Banana Bread, also involving a mention of my first ever attempt at a Wedding Cake

First Bake Stall!! Sigh. Memories.

This to.die.for Salted Caramel Chocolate Tart

The ultimate comfort food…Fettuccine Carbonara

My brother’s birthday cake: strawberries and cream cake

Classic Chocolate Cake with Swiss Meringue Buttercream on Spatula in My Pocket's 1st Blogiversary

Also can we just admire these pictures?

I threw myself a little blogiversary party.

Nothing much.

Just some mini cupcakes, normal cupcakes, donuts, and a giant pink ombre cake topped with MORE DONUTS. ^.^

Classic Chocolate Cake with Swiss Meringue Buttercream on Spatula in My Pocket's 1st BlogiversaryClassic Chocolate Cake with Swiss Meringue Buttercream on Spatula in My Pocket's 1st Blogiversary

Lastly, thank you all so much for your continued support and love!

I appreciate everyone who visits this humble website even when weeks go by without any new posts (guilty as charged).

Spatula in My Pocket is for you guys.

Classic Chocolate Cake with Swiss Meringue Buttercream on Spatula in My Pocket's 1st Blogiversary

I hope and pray with all my brownie-loving heart that the next year and the years to come bring endless prosperity and joy and rainbows and sprinkles to the domains of Spatula in My Pocket. I vow to be a better blogress and update more exciting recipes and answer all queries diligently!

Classic Chocolate Cake with Swiss Meringue Buttercream on Spatula in My Pocket's 1st Blogiversary

And now, without any more sentimental words, here’s the recipe for THE CHOCOLATE CAKE my inbox gets flooded with requests for. MUCH LOVE!

Classic Chocolate Cake with Swiss Meringue Buttercream

Serves 12
Ingredients:
For the Cake
2 ½ cups all-purpose flour
¾ cup cocoa powder
2 ½ teaspoons baking powder
¾ teaspoon baking soda
1/2 teaspoon salt
½ cup plus 2 tablespoons canola oil
2 cups granulated sugar
2 large eggs, at room temperature
1 large egg yolk, at room temperature
2 teaspoons vanilla essence
1 ½ cups whole milk, at room temperature
1 cup hot strong-brewed coffee
For the Swiss Meringue Buttercream
1 cup granulated sugar
4 large egg whites
250g softened unsalted butter
1 tsp vanilla essence
Directions:
Chocolate Cake
  1. Preheat oven to 180 degrees C. Grease and flour two 8-inch cakes pans and set aside.
  2. Sift together the flour, cocoa powder, baking powder, baking soda, and salt and set aside.
  3. In the bowl using a hand mixer, beat together the oil and sugar on medium speed for 2 minutes. With the mixer on, add the eggs, egg yolks, vanilla, and almond extract. Stop the mixer and scrape down the bowl.
  4. Turn the mixer to low and add the flour mixture in three batches, alternating with the milk, beginning and ending with the flour mixture. Stop the mixer and scrape down the bowl. With the mixer on low, stream in the coffee and mix just until combined.
  5. Evenly divide the batter among the prepared pans. Bake for 23 to 25 minutes, or until a toothpick inserted into the center of the cakes comes out clean. Cool completely before frosting.
Swiss Meringue Buttercream
  1. Place the egg whites and sugar in an extremely clean heatproof bowl. Place over a pan of simmering (not boiling) water and whisk with a hand whisk until the sugar has dissolved completely and the mixture is warm to the touch, if you rub some of the mixture between your fingers it should be smooth and you shouldn’t be able to feel any graininess, this will take about five minutes.
  2. Remove the bowl from the heat and attach it to your stand mixer with the whisk attachment or use an electric hand whisk, whisk the egg whites until it forms a thick, glossy, bright white meringue and is completely cool, the bottom of the bowl should feel cool to the touch, this will take about 10 minutes.
  3. Once the meringue is cold, switch the mixer to a low speed and begin to add the butter, a tablespoon at a time, make sure that each addition is fully incorporated before adding the next; the meringue will deflate a little and may begin to look curdled. This is normal, just keep adding the butter gradually and whipping away and it will come back together. If, once all the butter has been added, your mixture is runny, the butter may have been too soft or the meringue still warm, just put the bowl in the fridge for 15 minutes or so then carry on whipping.
  4. Once the buttercream is completely smooth and silky and all the butter has been incorporated, whisk in the vanilla extract. Keep cool in the fridge till ready to use
Assembling
  1. Place the bottom layer of cake on a cake plate or serving dish. Spread on about ½ to ¾ cup of the buttercream with an offset spatula. Top with the next layer of cake.
  2. Frost the cake with the remaining buttercream. Refrigerate until set, about 15 to 20 minutes.
*For the ombre effect; divide the buttercream into three bowls. Color to of the bowls with varying shades of pink. Starting from the bottom, spread the darkest color frost. Then spread the lighter pink above it. Cover the top layer with the white frosting. With a cake scraper, smooth the sides.


Black Forest Cupcakes

Father’s Day is just two days away!

I get really ecstatic when such days come near… getting rolled up in their preparations and planning, coaxing my sisters into making beautiful cards and water paintings, getting my brother to go get flowers. Planning the perfect celebratory cake is my part, and obviously, the most fun part.

I had planned out what I’d make for Father’s Day 2016 ages ago!

Something seasonal. Something mango. First attempt. We’ll see how it turns out. You can keep me company and see it being created in all its(hopeful) glory on Snapchat. Follow me @noora559

Moist Chocolate Cupcakes + Cherry Compote + Whipped Cream = YESPLEASE

When it comes to baking for my father, fruits are a must. No fancy schmancy, monstrous, chocolate dripping cakes for him. He’s more of a keep it light and simple type of person. His favorite creation of mine so far is this Strawberry and Cream Cake I made in March. Along with the cupcakes I am sharing today!

Moist Chocolate Cupcakes + Cherry Compote + Whipped Cream = YESPLEASE


Black Forest Cupcakes is what we surprised our father with last year. He had bought in a box of black cherries and I had leaped at the chance to make something Black Forest.

Moist Chocolate Cupcakes + Cherry Compote + Whipped Cream = YESPLEASE

Sharing with you this year because every father deserves to be surprised with a batch of these stunning cupcakes. Just talking about them is making me want to grab some cherries and make them right away!


Moist Chocolate Cupcakes + Cherry Compote + Whipped Cream = YESPLEASE

Moist Chocolate Cupcakes + Cherry Compote + Whipped Cream = YESPLEASE

The intense chocolate flavor was perfectly balanced by the tart cherry compote and paired with the light and airy whipped cream frosting…they were divine.

You can obviously skip the cherry compote filling, but then they’ll just be plain dark chocolate cupcakes (delicious but not with the magic that is Black Forest).

Moist Chocolate Cupcakes + Cherry Compote + Whipped Cream = YESPLEASE


I studded the tops with whole cherries, plucked in a Baba ❤ topper, and voila! Ready to surprise the best man I know and love.

Moist Chocolate Cupcakes + Cherry Compote + Whipped Cream = YESPLEASE

They are quick and simple, and a perfect way to use fresh cherries.

.

.

.

Make these and show your dad how much you love him.

Black Forest Cupcakes

Yields: 15 cupcakes
Ingredients:
CHOCOLATE CUPCAKES
1 and ½ cup all-purpose flour
½ cup cocoa powder
1 tsp baking soda
1 tsp baking powder
½ tsp salt
8 Tbsp. (113g) unsalted butter, melted1
1 and ¼ cup sugar
1 Tbsp. vegetable oil
1 large egg, at room temperature
½ tsp vanilla extract
½ cup buttermilk, at room temperature2
½ cup hot coffee3
WHIPPED CREAM FROSTING (for the recipe click here)
CHERRY COMPOTE FILLING
3/4 cup fresh cherries, chopped
2 tablespoons honey
1 teaspoon lemon juice
Directions:
Preheat oven to 180 degrees C.
Whisk together the flour, cocoa powder, baking soda, baking powder, and salt, Set aside.
In a large bowl, beat together the melted butter and sugar till the sugar dissolves. Add oil and mix well. Now add the egg and vanilla extract and beat for a minute, scraping off the sides. Whisk in the in the buttermilk.
Fold in the flour mixture into the wet ingredients gently till just incorporated. Do not over mix. Add hot coffee to the batter and whisk well again.
Divide it into cupcake pan filled with cupcake liners till ¾ full.
Bake for 16-18 minutes or until a toothpick inserted in the middle of the cupcake comes out clean.
Cool completely before filling.
While the cupcakes are cooling, make your cherry compote by combining the cherries, honey, and the lemon juice in a saucepan over medium-high heat. Simmer for 15 minutes until the cherries are soft and much of the liquid has evaporated. It will thicken as it cools.
Using a knife, remove a quarter size piece from the top of the cupcake. Don’t cut in too deep or the filling will ooze out the bottom..
Fill each cupcake with a tablespoon of the cherry filling, then pipe or spread the whipped cream over top.
Top with some whole cherries.
Notes
1.       If using salted butter, then omit the salt in the recipe
2.      DIY Buttermilk: ½ Tbsp. vinegar and enough milk to make ½ cup.
3.      Coffee just help intensify the chocolate flavor. You can sub with plain hot water. I used ¼ tsp instant coffee mixed in ½ cup boiling water.


Moist Chocolate Cupcakes + Cherry Compote + Whipped Cream = YESPLEASE


Strawberries and Cream Sponge Cake

Today I am sharing a childhood staple of almost everyone I know in Pakistan. Pretty sure it is the first cake we ever tasted. It’s the cake, I believe, we have blown candles out on at our birthday at least once in our childhood. Yuup, I am talking of the ‘fresh cream cake’… Or as I call it: the Mighty Sponge Cake. *drumroll*

Strawberry and Cream Sponge Cake

Those light airy layers of cake, soaked in a saccharine pineapple syrup, filled with chunks of pineapples, slathered with freshly whipped cream, and topped with candied cherries. Sigh.

Sound familiar?

This “fresh pineapple cake” and it’s equally delectable chocolate twin (the “Black Forest”) are my favorite. In today’s culture of double chocolate, triple-tiered cakes, the sponge cake presents something simple and lovely. Or maybe it’s just the sentimental value.

So, when my mother requested this cake over and over again, I was a bit hesitant to make it. What if I created a disaster and spoiled all my happy memories?!

Strawberry and Cream Sponge Cake

But I am not one to skip away from a challenge. I went on a Mighty Sponge research expedition.

I watched lots of YouTube tutorials and found some really interesting facts. (If you are not a baking enthusiast like me, feel free to skip the next bit). The sponge cake is of Japanese descent, and combined with strawberries it’s known as a Strawberry Shortcake. And because summer is here- baskets of fresh strawberries can be seen everywhere- I decided now is the perfect time to battle all sponge cake fears, and make it!

Strawberry and Cream Sponge Cake

One recipe particularly caught my eye. Jon Jon’s beautiful step by step pictures and beautiful description to match made the recipe really easy to follow.

Here’s what I learnt about:

The Sponge Cake

The two things about sponge cakes that completely threw me off the hook though are:

  1. There is no butter or oil involved in the recipe. None at all.

  1. No fats means no greasing of pans! You bake the batter in an ungreased pan and technically the cake is supposed to pop out like a dream… My experience was slightly different.

  1. No leavening agents. No baking soda. No baking powder whatsoever.

Strawberry and Cream Sponge Cake

 *the original sponge cake recipe does not involve any fat in the form of butter nor oil. But other kinds of sponge, like the British version “Victoria Sponge Cake” calls for butter in the batter. So don’t get confused.

The cake rises without adding in any leavening agents or fat, because of all the air you incorporate into the batter, for which the eggs need to be mixed separately:

  • Egg yolks together with the sugar; beaten till thick and pale

  • Egg whites whisked to stiff peaks

The vigorous beating of the two is what incorporates so much air into the batter, making it light and fluffy.

Strawberry and Cream Sponge Cake

Also, the first time I made this cake, it stuck to the bottom of the pan and was a pain to get out. The second time I made it, I lined the pan with some parchment paper. I did NOT grease it, just lined it with paper. And the cake came out perfectly (phew).

The Syrup

I used the pineapple syrup you get from the can of pineapples to soak my cake in. You can substitute it with a simple homemade sugar syrup (reduced sugar and water). Just remember to brush the cakes liberally with syrup. You may think it’s alot when doing so, but trust me, the cake is dry because it is missing the moisture from the fats. It needs all the juice it can get.

The Whipped Cream

Here’s the thing, cream in Pakistan just won’t whip! You have to wait for the peak winter months to get them stiff peaks. Rest of the year? Just forget about whipped cream desserts.

To get it really whipped, here’s what I’ve learnt about cream:

  • Olper’s works better than Nestle (I’ve only just discovered this recently)

  • Make sure your cream is chilled aka VERY cold.

  • Pop your metal mixing bowl and your beaters into the freezer half an hour before whipping cream. The colder everything is; faster will the cream whip.

The Filling:

I’ve used pineapples in between the layers of the cake, and adorned the entire outside with fresh strawberries. You can skip the pineapples entirely and place strawberries in-between the layers instead. And use plain sugar syrup instead of the pineapple syrup. I just happen to like pineapples. Alot.

Strawberry and Cream Sponge Cake

All in all, just remember to:

  • Beat the eggs well

  • Do not overmix after the flour has been incorporated

  • Line pan with parchment paper for easy removal

  • Soak the cakes in syrup well

  • Strawberries can be replaced with any fresh fruit; mangoes, peaches, cherries, more pineapples…

Strawberry and Cream Sponge Cake

This is such a teaching post. I feel really proud of myself. So bake the cake! If you have too many strawberries or are simply nostalgic for the cream cake.

Caution: Make it before the strawberries disappear, and before it becomes too hot to whip cream (Ugh. Not looking forward to the drippy cream season.) Happy summer!

Strawberry and Cream Sponge Cake

Yields: 2 9-inch layer cakes
Ingredients:
SPONGE CAKE:
  • 6 eggs, separated *at room temperature
  • 1 cup castor sugar
  • 1/4 cup water
  • 1 teaspoon vanilla extract
  • 1 cup cake flour1
  • 1/2 teaspoon cream of tartar2
  • 1/4 teaspoon salt
  • ½ kilo fresh strawberries, washed, stemmed and sliced
  • a tin of pineapple chunks
WHIPPED CREAM:
  • 2 cups very cold whipping cream3
  • 1/2 cup powdered sugar
  • 1 teaspoon vanilla extract
Directions:
For the Sponge Cake:
Preheat oven to 150 degrees C.
In a large bowl, beat together the egg yolks until very thick and lemon colored. Beat in sugar gradually. Add water and vanilla extract. Beat again. Mix in the flour.
In another clean bowl, beat egg whites until frothy. Then add cream of tartar and salt. Beat mixture until glossy and stiff peaks form.
Fold the whipped egg whites mixture into yolk mixture, gradually and very carefully, so as to not deflate the egg whites.
Pour the batter into two ungreased 9 inch pans lined with parchment paper.4
Bake for 60 minutes, or until golden brown and a toothpick inserted in the middle comes out clean.
Allow the cakes to cool completely before inverting.
For the Whipped Cream:5
In a large metal bowl, pour the cream and mix on low-medium speed for several minutes. Once the cream starts to thicken, add the sugar and vanilla. Continue to whip on medium-high until soft peaks form.
Assembling:
Place one of the layers on a serving plate. Brush on the pineapple syrup, that comes in the can of pineapples, evenly and quite liberally onto the first layer. Spread spoonfuls of the whipped cream and spread evenly over the cake layer. Arrange the pineapple chunks over the cream. Top with another spoonful of cream and spread once again.
Top with the second layer of sponge cake, and brush with more of the pineapple syrup. Now, using an offset spatula or a plain knife, cover the entire cake completely with the remaining whipped cream.
Decorate with sliced strawberries. Slice and serve. Store any leftover cake, covered, in the fridge. This cake is best served chilled.
Enjoy!
Notes:
1.  DIY Cake Flour: Measure out 1 cup of all-purpose flour.  Remove 2 tablespoons of the flour and place it back in your flour jar.  Replace the removed flour with 2 tablespoons of cornflour. Sift 2-3 times.
2.  Cream of Tartar substitute: ¼ tsp lemon juice or vinegar. You can also completely omit the cream of tartar, it just helps to stabilize the egg whites.
3.  I used and recommend Olpher’s Cream. 2 packs of it; 400ml in total.
4.  Spray a bit of oil on the bottom of you pan, so that the parchment paper sticks to it. But DON’T grease the parchment paper.
5.  The colder the cream, the faster it will whip. See tips above in the description on how to whip cream the right way.
Recipe adapted from: Candid Appetite

A Red Velvet Murder

All of you witches, elves, goblins, werewolves, zombies and…pumpkins get your Halloween jazz on with this cake because…it’s nearly Halloweeeeen! Favorite day for most of you is JUST THREE days away!

This blood splattered Red Velvet cake will make for a perfect center piece for your Halloween party, and will have everyone’s taste buds quivering!

The classic Red Velvet, that I made earlier this week, has now been murdered, splattering blood all over! *gasps*

This blood splattered Red Velvet cake will make for a perfect center piece for your Halloween party, and will have everyone’s taste buds quivering!

This blood splattered Red Velvet cake will make for a perfect center piece for your Halloween party, and will have everyone’s taste buds quivering!

The two layered moist Red Velvet cake, all covered with a creamy luscious whipped cream cheese frosting is splattered with edible blood to give it that spooky touch.

This blood splattered cake will make for a perfect center piece for your Halloween party, and will have everyone’s taste buds quivering!

This blood splattered Red Velvet cake will make for a perfect center piece for your Halloween party, and will have everyone’s taste buds quivering! This blood splattered Red Velvet cake will make for a perfect center piece for your Halloween party, and will have everyone’s taste buds quivering!

Make the cake. {A detailed post on how to make this cake can be seen HERE.} Spray on some blood, :3 Then, all there’s left to do is to grab a knife and dig in!

Happy Halloween everyone! 😀

This blood splattered Red Velvet cake will make for a perfect center piece for your Halloween party, and will have everyone’s taste buds quivering! This blood splattered Red Velvet cake will make for a perfect center piece for your Halloween party, and will have everyone’s taste buds quivering! This blood splattered Red Velvet cake will make for a perfect center piece for your Halloween party, and will have everyone’s taste buds quivering!

A Red Velvet Murder

Ingredients:
Red Velvet Cake with Whipped Cream Cheese Frosting (RECIPE)
Edible “Blood”:
1 Tablespoon water
2 Tablespoon corn flour (or corn starch)
1 teaspoon red food coloring
2 drops green food coloring
1 teaspoon honey
Directions:
Prepare and frost cake as directed HERE.
For the blood: combine all the ingredients, and mix well. Adjust water and corn flour according to thickness.
Assembly: Place cake on a piece of parchment paper or newspaper. Dip a toothbrush in the prepared blood and run your finger across the bristles of the brush in order to create a spray effect onto the cake. Flick the brush to create drops of blood.
Stick a knife in and serve.

https://spatulainmypocket.com/2015/10/23/red-velvet-cake-with-whipped-cream-cheese-frosting/

Red Velvet Cake with Whipped Cream Cheese Frosting

 *Please excuse the colors in the pictures. The sun kept coming in and out.

**If you’re wondering why the top of the cake is bare and not that smooth, that’s because it is yet to be dressed! You’ll know why in a couple of days. :3

Red Velvet Cake with Whipped Cream Cheese Frosting! Soft and moist; sweet with a hint of tanginess.

I’ve never really liked Red Velvet.

 Red Velvet Cake with Whipped Cream Cheese Frosting! Soft and moist; sweet with a hint of tanginess.

The truth is, Red Velvet and I have never really gotten along together. Our relationship has always been rocky. The first time I attempted to make a Red Velvet cake was 4 years ago for Father’s Day. The cake was huge and yummy and definitely velvety in taste, but red? Not so much. It was half maroon and half brown (grrrh).

 Red Velvet Cake with Whipped Cream Cheese Frosting! Soft and moist; sweet with a hint of tanginess.

The next time, I attempted red velvet cupcakes. This time the cakes were perfect, but the frosting was too runny. So runny that I literally just dunked the cupcakes in it, like a donut being dunked to glaze it. My dream of a thick, lush cream cheesy frosting was still a dream.

Red Velvet Cake with Whipped Cream Cheese Frosting! Soft and moist; sweet with a hint of tanginess.

This one. This time, I can proudly say that this is in fact one of the best cakes I’ve ever made. It is soft and moist; sweet with a hint of tanginess. The crumbly texture along with the smooth creamy frosting makes for one hell of a cake.

Red Velvet Cake with Whipped Cream Cheese Frosting! Soft and moist; sweet with a hint of tanginess.

Need more evidence than just my word? My up-nosed brother, the pickiest eater of all, asked for more cake again and again. AND he liked my frosting! He never compliments my frosting! Or anything for that matter! (The memory of his compliments still makes me giddy).

Red Velvet Cake with Whipped Cream Cheese Frosting! Soft and moist; sweet with a hint of tanginess.

 Red Velvet Cake with Whipped Cream Cheese Frosting! Soft and moist; sweet with a hint of tanginess.

It was a two layered, 9 inched beauty. It rose majestically, light and airy, and sprinkled the world with fairy dust (not really).

Enough with me being a parrot about my wonderful cake, now for the educational part:

Red Food Coloring:

I used liquid food color. But you can use whatever you can find. I’ve listed a few points here about each of the choices.

Gel food color:

  • Not available in any shops here in Pakistan. Can be bought online, bit pricy though.

  • Gives the best results.

  • Use a whole 1-ounce bottle.

Liquid Food Color:

  • Available in some supermarkets here in Pakistan.

  • Reasonably priced.

  • Results are meh. Doesn’t give that bright of a color.

  • Use an entire bottle to get the right shade of red, around 2-3 Tablespoon.

Powdered Food Color:

  • Available in almost all supermarkets in Pakistan.

  • Very cheap.

  • Least desired result.

  • Can be harmful if used in large quantities.

  • You’ll need around 2 teaspoons for this size of cake.

  • Mix it in the buttermilk before adding into the cake mix.

Cream Cheese Frosting:

For the perfect cream cheese frosting you need to use THIS…brick-style cream cheese:

NOT THIS…cream cheese spread:

BUT, the brick form is rarely available and I have been blessed only twice with it.

So, the cream cheese “spread” can be used instead. BUT (warning) it leads to a very runny frosting which is not pipe-able at all. So you need to adjust the ratios accordingly.

Instead of the classic cream cheese frosting made with butter, I decided to make the much lighter and fluffier whipped cream cheese frosting. I, personally am not a huge fan of tons and tons of frosting slathered on my cake. A thin layer does just fine. You can see in the pictures, the frosting is just enough to hold the two layers together, and to cover the entire thing without any crumbs showing.

Red Velvet Cake with Whipped Cream Cheese Frosting! Soft and moist; sweet with a hint of tanginess.

The whipped cream cheese frosting is very easy to put together and compliments the red velvet purrrfectly. You need to first whip your cream till stiff peaks form. (You know why I love autumn most? Because I can whip my cream. Yayyy. And it doesn’t turn into a gloppy mess.) Peaks form. I’ll be making a lot of whipped cream recipes these few months, making the most of the cold.

Anyhow, whip the cream. In another bowl beat your cream cheese, I used Puck’s cream cheese spread, with icing sugar. Then “gently” fold in the whipped cream. Chill for a bit to firm it up a bit. And voila! You’ve got your heaven of a frosting. It’s smooth, and velvety, not cloyingly sweet like buttercream. It’s light and spreads like a dream.

Butter and Oil:

This recipe does not use a copious amount of oil, because there’s butter in there too. Butter adds flavor. Oil helps keep the cake moist. Yes, you need them both! No substituting or eliminating!

Red Velvet Cake with Whipped Cream Cheese Frosting! Soft and moist; sweet with a hint of tanginess.

And that’s pretty much all you need to know to make the perfect red velvet (and the recipe of course!). Now that you know everything you need to know, you know what you have to do… It’s the perfect weather for baking. Make this, and enjoy with friends and family. Or just yourself, with a nice cuppa tea.

Red Velvet Cake with Whipped Cream Cheese Frosting

Ingredients
·         2 3/4 cups (365g) all-purpose flour
·         1/4 cup (25g) cocoa powder
·         1 tsp baking soda
·         1/4 tsp salt
·         2 cups (403g) granulated sugar
·         3/4 cup (6 oz) unsalted butter, softened
·         1/3 cup vegetable or canola oil
·         3 large eggs
·         2 large egg yolks
·         1 oz liquid red food coloring
·         1 1/3 cups buttermilk1
·         1 tsp vanilla extract
·         1 1/2 tsp vinegar
Frosting
·         8 oz cream cheese, softened
·         1 pack, or 1 ½ cup heavy cream
·         1 tsp vanilla extract
·         1 cup powdered icing sugar
Directions
For the cake:
·Preheat oven to 180 degrees. Grease 2 3-inch round baking pans, then line bottom of each with a round of parchment paper and butter parchment, set aside.
In a bowl add flour, baking soda, salt, and cocoa powder. Mix together. Set aside.
In another bowl, beat together sugar and butter until pale and fluffy. Mix in vegetable oil. Blend in eggs one at a time, mixing just until combined after each addition. Mix in egg yolks then red food coloring.
In a liquid measuring cup, measure out buttermilk then whisk in vanilla extract and vinegar. Working in three separate, beginning and ending with flour mixture, add 1/3 of the flour mixture alternating with 1/2 of the buttermilk mixture and mixing just until combined after each addition. Scrape down sides and bottom of bowl with a rubber spatula to ensure everything is incorporated. Divide mixture evenly among two prepared baking pans. Spread into an even layer and bake in preheated oven 26 – 30 minutes until toothpick inserted into center of cake comes out clean. Cool in cake pan 10 minutes then run knife around edges of cake to loosen and invert onto wire racks to cool completely. Once cool, frost with Whipped Cream Cheese Frosting. Store cake in an airtight container in refrigerator.
For the frosting:
In a bowl whip the cream on high till stiff peaks form.
In another bowl, beat together the cream cheese and sugar until combined. Then, gently fold in the whipped cream till fully combined. Keep chilled till ready to use.
Notes:
  1. To make homemade buttermilk: Take 1 Tbsp + 1/4 tsp vinegar in a measuring jug. Add enough milk to make 1 1/3 cup. Let it sit for 15 mins at room temperature. Stir and then use.
*If using salted butter, omit salt.
*Cake can be made in 9-inch cake pans too.
*To whip cream, chill the blow and beaters in the freezer an hour before whipping. Also make sure the cream is cold. The colder the cream, the faster it whips.
·
· Recipe source: Cooking Classy

Red Velvet Cake with Whipped Cream Cheese Frosting! Soft and moist; sweet with a hint of tanginess.

Sticky Toffee Pudding

“Autumn is a second spring when every leaf is a flower.”

-Albert Camus

Fall is my fav!

Of foggy breaths, funky socks and marshmallows in hot drinks… autumn is love because it announces the coming of winter. And what better way to celebrate this awesome mausum than with something composed of rich caramely goodness, dates and warm toffee.

Sticky Toffee Pudding..rich, buttery, and oh so decadent.

After Hajj 2015 ( I hope all your loved ones are home safe by the grace of Allah), many of you will have loads of beautiful fresh dates. So this seemed like the perfect time to share the recipe of a sticky date pudding with you. I bet most of you don’t eat more than a few dates anyway (unless cajoled by your mums). Instead of popping them dates straight in your mouth, why not turn them into something even more delicious (and edible).

Sticky Toffee Pudding..rich, buttery, and oh so decadent.

This dessert is a British classic that has become a favorite worldwide. Made with dates, butter and lots of caramel, it has the power to turn any chocolate lover around. If my sister (a committed chocoholic) can claim this to be one of her favorite dessert, so can you!

 Sticky Toffee Pudding..rich, buttery, and oh so decadent.

Maybe pudding is a little (ok, a lot) misleading for the desi in us. But the British call all their desserts puddings (don’t ask me why), and this dish is thoroughly British. Its a date-studded cake/pudding that is drowned in a sea of warm butterscotch sauce after baking.

Sticky Toffee Pudding..rich, buttery, and oh so decadent.

Here I’ll like to admit to two horrendous misconceptions I had before making this cake/pudding.

1) I was never enamored with the idea of baking dates. The thought of mushy, khajoor-y cake made me ick and think of strawberry and cream.

2) The second thought that drove me insane was of the sweetness upon sweetness. Sugary sweet dates with a thick caramel sauce. Who will willingly induce a sugar coma?

But, I was wrong and you will be too when you make this cake/pudding.

Sticky Toffee Pudding..rich, buttery, and oh so decadent.

Everything in it is perfectly balanced. The flavor isn’t over-poweringly date-like. In fact you will hardly be able to tell there are dates in it. It’s the toffee sauce that takes all the glory.

The toffee sauce is unbelievably addicting. And not just with this date pudding, but with anything. On ice-creams, drizzled on top of pies, breads, or just on a spoon straight into your mouth (unless you are diabetic). And it’s super easy to make too. Just pop everything (the butter, brown sugar and cream) in a saucepan. Bring to a gentle boil. And you’re done. It’s thick and pourable, and settles on top of the moist date sponge like a glaze, complimenting it perfectly.

The whole shebang is rich, buttery, and oh so decadent.

Bake it in the form of one cake..

Sticky Toffee Pudding..rich, buttery, and oh so decadent.

Or several mini cakes…

Sticky Toffee Pudding..rich, buttery, and oh so decadent.

Either way, it’s a must for the chilly season to come!

Sticky Toffee Pudding

Serves 8

Ingredients:

Pudding
¼ cup (52g) butter, at room temperature
1 ½ cup all-purpose flour, sifted
1 ½ cup (6 ounces) chopped pitted dates
1 teaspoon baking soda
1 teaspoon baking powder
1 cup granulated sugar
1 teaspoon vanilla extract
2 large eggs, at room temperature
1 ¼ cup water
Sauce
1 cup brown sugar, packed
½ cup heavy cream
¼ cup (52g) butter
½ teaspoon vanilla extract

Directions:

For the pudding:
Preheat oven to 180 degrees C.
Butter a muffin tray or an 8×8 baking dish. Set aside.
Bring dates and the water to a boil in a medium saucepan. Remove from heat; stir in baking soda (mixture will become foamy). Set aside, and let it cool to room temperature.
In a bowl, whisk together the flour and baking powder.
In another bowl, with the help of an electric mixer, beat together the softened butter, sugar, and vanilla. Mixture will be grainy.
Add 1 egg; beat to blend. Add half of flour mixture and half of date mixture; beat to blend. Repeat with remaining 1 egg, flour mixture, and date mixture.
Pour batter into prepared pan.
Bake for 40-45 minutes or until a toothpick inserted in the middle comes out clean.
Let cool slightly in the pan, then invert onto a wire rack.
For the sauce:
In a small saucepan, bring the brown sugar, cream, and butter to a boil over medium heat. Continue to boil, stirring constantly, for 2 minutes. Remove from heat, and stir in vanilla extract.
Cut warm cake into slices. Pour prepared toffee sauce on top. Serve with a dollop of whipped cream or a scoop of vanilla ice cream.
Notes:
*Can also be made in a Bundt pan or a muffin tray.
**Warm leftovers in the microwave before serving. Leftovers, even the sauce, can be stored in the refrigerator for over a week. 
Recipe source:  Bon Appétit

Sticky Toffee Pudding..rich, buttery, and oh so decadent.

Poke holes in the cake to drench it completely in the toffee sauce.

Sticky Toffee Pudding..rich, buttery, and oh so decadent.

MOLTEN LAVA CAKE

Dark, rich and oh so’ decadent.

y

First blog post yayee!

yweah

About time I put down Downton Abbey and hit publish on the first post I had secretly stashed away waiting for the right time. Well this is it, as good as it can get. With summer almost over for most of us, with college opening up soon, I am just about now getting started with the blog I had to presumably launch last year, and then this June, and then in July…. Alas, better late than never. And what better way to kick start this, hopefully, burgeoning blooming fabulous blog than with…..CHOCOLATE!

That thick sludge of chocolate with the melting vanilla ice cream; makes for one killer combination.

Molten Lava Cake

The recipe is so easy and takes just about thirty minutes from start to finish. A few ingredients is all you need.

Molten Lava Cake

A molten lava cake is all about the chocolate. So I’d highly recommend using the best quality brand of chocolate you can find.  You can really taste the difference.

I use a combination of dark chocolate, Lindt 70% Cocoa, and Hershey’s semisweet chocolate chips, just to get the right balance. You could go all semi-sweet or all dark, and, fair warning, just stay away from milk chocolate or you’ll end up with sickeningly sweet cakes.

Molten Lava Cake

To make these tiny pieces of chocolate haven you need to melt the chocolate along with the butter, beat in the eggs and sugar. Then fold in the flour. Transfer the mix in the prepared pans. Bake for about 12 to 15 mintues, and that’s it! You’re done.

Molten Lava Cake

The key is in the timing. Cook these cakes for a smidgen more than the stated time …will result in cakes good enough but minus the lava, minus the ooey gooeyness. Undercook them and the cakes won’t hold their shape.

Molten Lava Cake

You can make them in ramekins, and then serve them in the ramekins. But if you, like me, don’t have ramekins, and see no need to go buy them, then go ahead and make them in a muffin tray like I did. They turn out beautiful. Miniature molten lava cakes, the perfect serving size.

They’ll be wiped out in seconds.

Molten Lava Cake


Molten Lava Cakes

Prep Time: 15 minutes                                                                        Yields: 8 mini ones

Cook Time: 12 to 15 minutes

Ingredients:

8 ounces (227g) bittersweet or semisweet chocolate

½ cup (115g) butter

3 eggs

1/2 cup granulated sugar

1/2 cup flour

1 teaspoon vanilla extract

Directions:

Preheat oven to 200 degrees C.

Butter a muffin tray or ramekins well. Sprinkle cocoa powder, shake off the excess.

Melt the chocolate and butter in a double boiler (in a bowl over a pan of simmering water).

In the bowl beat the eggs and sugar until pale, about two minutes, beat in the vanilla.

Stir in the egg mixture into the chocolate and then add the flour, mix well. Divide the batter among the prepared ramekins or a muffin tray and bake for 12 to 15 minutes, the edges should be firm and set but the center will still look a little wet.

Run a knife loosely around the edges and turn them out of the muffin tray or ramekins.

Serve immediately with vanilla ice cream or a dollop of whipped cream.

Recipe source: Delicious shots

ij